Every product is independently reviewed and selected by our editors. If you buy something through our links, we may earn an affiliate commission at no extra cost to you.
Great grilling isn’t just about choosing the right cut of meat—it’s about mastering the fire. Controlling the temperature of a charcoal grill is one of the most essential (and often overlooked) skills that separates a backyard beginner from a true pitmaster.
Without precise heat management, even the best ingredients can end up undercooked, overdone, or just plain disappointing.
We’ll walk you through the best ways to control and maintain the perfect grilling temperature.
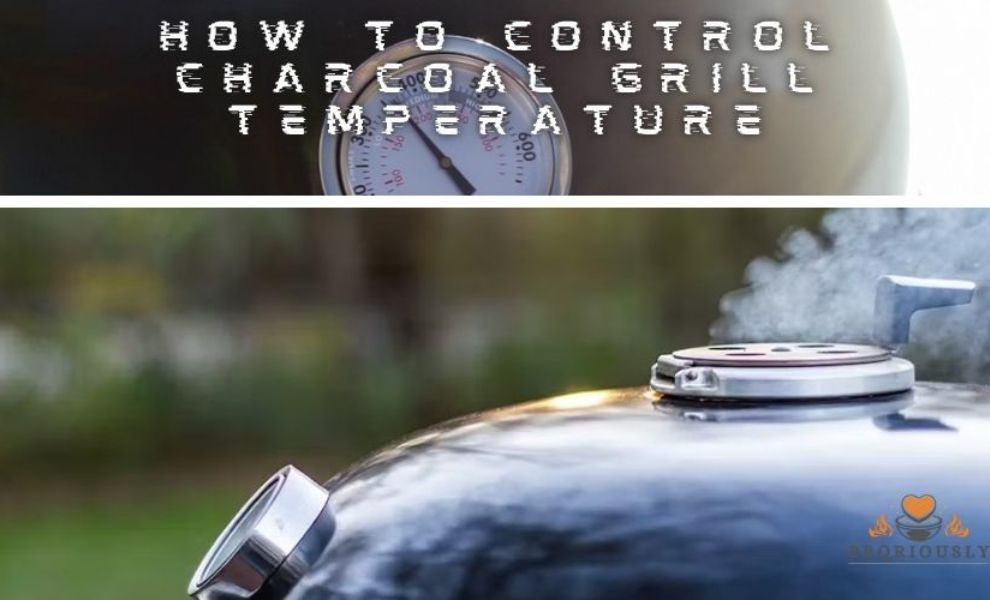
How To Control Charcoal Grill Temperature: Master the Flame
Take control of your grill by learning how to manage heat like a pro. From vent adjustments to coal placement, mastering the flame is the key to perfect BBQ every time.
Choosing The Right Charcoal
The type of charcoal you choose can make a significant difference in both heat generation and consistency. It also impacts the flavor of your grilled food. With the right charcoal, you can maintain a steady temperature, ensuring your grilling is a success every time.
Types Of Charcoal
Charcoal comes in various forms, each with unique properties that affect your grilling temperature. Let’s explore the common types:
- Lump Charcoal: This is pure hardwood charcoal. It lights quickly and burns hot, giving you a searing temperature perfect for steaks.
- Briquettes: These are made from compressed charcoal dust and other materials. They offer a consistent burn rate and temperature, ideal for slow-cooking meats.

When deciding between lump and briquettes, consider the following:
| Charcoal Type | Lighting Speed | Burn Time | Temperature Control |
| Lump Charcoal | Fast | Shorter | Variable |
| Briquettes | Slower | Longer | Consistent |
For quick grilling sessions, lump charcoal is your friend. For longer, more controlled cooking, briquettes are the way to go. Remember, the goal is to match your charcoal type to your cooking needs.
Quality Indicators
Not all charcoal is created equal. To ensure you’re getting the best, look for these quality indicators:
- Hardwood Source: Premium charcoal often comes from dense hardwoods like oak or hickory.
- Low Dust Content: High-quality charcoal contains minimal dust, indicating less filler material.
- Uniform Size: Consistent briquette or lump sizes burn more evenly for better temperature control.
Check the packaging for clues about quality. Good charcoal often states its wood source and boasts about purity or premium status. Avoid products with excessive lighting fluids or additives, as they can taint your food’s flavor and produce uneven heat.
Remember, the quality of your charcoal can transform your grilling experience. Invest in a reputable brand that meets these standards, and you’ll be set for a successful BBQ with perfect temperature control.
Setting Up The Grill
A perfect barbecue depends on how well you control the grill’s temperature. Getting the temperature right means juicy steaks and perfect burgers. Let’s walk through the steps to set up your grill for success.
Charcoal Arrangement
The way you lay out your charcoal is key to temperature control. Think of your grill as a canvas and the charcoal as your paint. Here’s how to create your masterpiece:
- Direct Heat: Spread the charcoal evenly across the grill if you want high heat over the entire surface. This is great for searing steaks or cooking burgers.
- Indirect Heat: For slower cooking, like for a whole chicken, pile charcoal on one side. You cook the food on the other side, away from the coals.
- Two-Zone Setup: This is a combo of the two methods above. Pile coals on one side for a hot zone, and have fewer or no coals on the other for a cooler zone.
Here’s a simple guide to help you decide how much charcoal to use:
| Food Type | Charcoal Amount |
| Steaks/Burgers | Full layer of coals |
| Chicken/Fish | Half layer of coals |
| Low & Slow | Quarter layer of coals |
Remember, more charcoal means more heat. Adjust the quantity to match your cooking needs.
Airflow Management
Controlling the grill’s airflow is like using the gas pedal in your car. It’s how you accelerate or slow down the heat. Here are some tips:
- Vents Open: Keep the vents open to stoke the fire. More oxygen means higher temperatures.
- Vents Partially Open: If it’s too hot, partially close the vents. This limits oxygen and lowers the temperature.
- Vents Closed: Close the vents to put out the fire. Do this when you’re done grilling.
Monitor the temperature with a grill thermometer. Here’s a quick reference:
| Desired Temperature | Vent Position |
| High Heat (450-550°F) | Vents wide open |
| Medium Heat (350-450°F) | Vents half open |
| Low Heat (250-350°F) | Vents barely open |
It’s a balance. Keep an eye on the thermometer and adjust the vents as needed. Practice makes perfect!
Lighting Techniques
A key part is how you light it. Different lighting techniques can change how hot your grill gets and how fast. Let’s dive into some methods to get your grill lit and ready for cooking.
Using Lighters
Lighters are a common tool to start your charcoal grill. Here’s how to do it right:
- Use a chimney starter. It’s a metal cylinder that makes lighting charcoal easier and faster. Here’s a simple guide:
- Fill the top part with charcoal.
- Put lighter cubes under it, then light them.
- Wait 15-20 minutes until coals are ashy, then pour them into the grill.
- Lighter fluid method. While quicker, it needs care:
- Arrange your charcoal in a pile.
- Pour lighter fluid evenly on the charcoal. Wait a minute.
- Light the charcoal with a match or lighter.
- Important: Never add more fluid after lighting. It’s dangerous.

Choosing between these depends on your preference and what you have handy. Chimney starters are safer and eco-friendlier, while lighter fluid offers speed.
Natural Methods
For those preferring a more natural approach, here are some options:
- Use a fire starter. Natural fire starters are made from wood shavings or wax. They light easily and don’t add chemicals to your food. Here’s how:
- Place the fire starter in your grill.
- Surround it with charcoal.
- Light the starter.
- Electric charcoal starter. This tool heats up and ignites charcoal without flames. Steps to use:
- Place the electric starter in the middle of your charcoal pile.
- Plug it in. Wait 8-10 minutes.
- Remove the starter carefully. Wait for coals to ash over.
These methods are great for those avoiding chemicals. They may take longer but are better for your health and the environment.
Temperature Monitoring
To ensure your grilled dishes are always perfect, controlling the temperature is key. This task may seem daunting, but with the right techniques, it’s quite manageable. Let’s dive into the crucial aspect of temperature monitoring which can make or break your grilling success.
Using Thermometers
One reliable method to monitor your grill’s temperature is by using thermometers. There are various types of thermometers, each with their specific uses:
- Digital Instant-Read Thermometers: Provide a quick temperature readout, ideal for checking meat doneness.
- Analog Thermometers: These take longer to read but are useful for getting general temperature trends over time.
- Grill Surface Thermometers: Placed directly on the grill, they measure the surface temperature, crucial for cooking techniques like searing.
Here’s a simple guide to use thermometers:
- Insert the thermometer probe into the thickest part of the meat, avoiding bones and fat.
- Wait for the readout to stabilize on a digital thermometer or give analog ones a few minutes to adjust.
- Compare the temperature with recommended cooking temperatures for your specific dish.
Remember to regularly calibrate your thermometers to ensure accuracy. This involves using a bowl of ice water or boiling water to check if they read 32°F (0°C) or 212°F (100°C) respectively, adjusting as necessary.
Visual Cues
Even without a thermometer, you can use visual cues to monitor your grill’s temperature:
- Coal Glow: Bright white coals are hotter than darker red ones.
- Smoke: Thin blue smoke indicates a good temperature for smoking meats, while thick white smoke suggests it’s too hot and may impart a bitter taste.
- Hand Test: Carefully hold your hand above the grill. Count the seconds you can keep it there. Fewer seconds indicate higher heat.
A basic hand test guide:
| Seconds | Heat Level |
| 2 seconds | High Heat |
| 4 seconds | Medium Heat |
| 6 seconds | Low Heat |
Observing the lid’s temperature can also give clues. A hot lid means the grill is likely at a high temperature. Adjust the vents to control airflow and regulate the heat. Open vents mean more oxygen, which increases heat. Close them slightly to reduce the temperature. Keep a close eye on these cues for better control over your grill’s temperature.
Controlling Heat Levels
The right temperature ensures foods cook evenly, develop a delicious crust, and retain their natural juices. Let’s dive into the techniques that keep the grill’s heat just right.
Adjusting Vents
The vents on your charcoal grill play a vital role in temperature control. They regulate airflow, which in turn affects how hot your coals burn. Here’s a simple guide to adjusting vents:
- Open Vents: More air means hotter and faster-burning coals. Keep vents wide open to reach high temperatures, ideal for searing meat.
- Closed Vents: Less air slows down the burning process, reducing the heat. Partially close vents to maintain a moderate temperature for cooking items like chicken or fish.
- Checking Temperature: Use a grill thermometer to monitor the heat. Adjust vents as needed to maintain the desired temperature.
Remember, the top vent controls the outflow of smoke and heat, while the bottom vent manages the inflow of air. Balance both to stabilize the temperature. Here’s a quick reference table:
| Desired Temperature | Top Vent Position | Bottom Vent Position |
| High Heat | Fully Open | Fully Open |
| Medium Heat | Half Open | Half Open |
| Low Heat | Slightly Open | Slightly Open |
Practice makes perfect. Adjust vents bit by bit, and give the grill time to respond. It might take a few tries to get it just right.
Adding Charcoal
Sometimes, adjusting vents isn’t enough, and you might need to add charcoal. Here’s how to do it effectively:
- Direct Heat: When grilling directly over the coals, spread them evenly. If the temperature drops, add more charcoal and wait for them to ash over before resuming cooking.
- Indirect Heat: For foods that require longer cooking times, pile the charcoal on one side. Add more coals periodically to maintain consistent heat.
Keeping a steady temperature is about adding the right amount of charcoal at the right time. Here’s a guideline to help you:
| Grilling Time | Extra Charcoal | When to Add |
| 30 minutes | A handful | After first 15 minutes |
| 1 hour | Two handfuls | Every 30 minutes |
| 2 hours+ | Three handfuls | Every hour |
Always have extra charcoal ready. This way, you won’t lose precious grilling time. Remember to let the new coals get hot before putting the food back on the grill.
Indirect Vs Direct Heat
Controlling the temperature on a charcoal grill is key to great cooking. Two methods stand out: indirect and direct heat. Think of direct heat like cooking on a stove, hot and fast. Indirect heat is more like an oven, slow and even. Both methods have their place in grilling. Let’s dive into when to use each and their pros and cons.
When To Use Each
Choosing between indirect and direct heat depends on the food you’re cooking. Here’s a simple guide:
- Direct Heat: Use this for thin cuts of meat, vegetables, or anything that cooks quickly. It’s great for searing and locking in flavors.
- Indirect Heat: Best for thick cuts of meat or dishes needing slow cooking. This method allows food to cook thoroughly without burning the outside.
Imagine you’re grilling chicken wings and a large pork roast. Start the wings over direct heat for a crispy exterior. The roast, however, should cook over indirect heat to ensure it’s cooked evenly inside without charring the outside.
| Food Type | Direct Heat | Indirect Heat |
| Steaks | X | |
| Vegetables | X | |
| Whole Chicken | X | |
Benefits And Drawbacks
Each method has its advantages and disadvantages. Let’s break them down:
- Direct Heat:
- Advantage: Cooks food quickly.
- Disadvantage: Can easily burn food if not watched closely.
- Indirect Heat:
- Advantage: Perfect for slow-cooking and tenderizing meat.
- Disadvantage: Takes longer to cook food.
Direct heat is great when you’re short on time. But, it requires constant attention to avoid overcooking. On the other hand, indirect heat is your friend for a weekend BBQ. It lets you relax while the grill does the work, slowly cooking your meat to perfection.
Remember, mastering temperature control on your charcoal grill opens up a world of possibilities. From juicy steaks to tender ribs, knowing when and how to use direct and indirect heat can make all the difference. Happy grilling!
Managing Cooking Times
Grilling the perfect meal is all about control. Specifically, controlling the temperature of your charcoal grill is vital for managing cooking times.
Let’s explore how to keep the flame at the ideal level for the food you’re cooking.
Timing Techniques
Mastering the art of grilling involves learning a few key timing techniques. Here’s what you need to know:
- Zone Creation: Set up direct and indirect heat zones by arranging coals unevenly. Use the direct zone for searing and the indirect for cooking through.
- Lid On or Off: Keeping the lid on increases temperature and smoke, while off lets heat escape. Balance these for the desired cooking environment.
- Vent Management: Adjust the grill’s vents to control airflow. More air means higher temperatures, while less air cools it down.
Keep a close eye on your grill’s built-in thermometer to track the temperature. No thermometer? Hold your hand above the grill. If you can keep it there for 2 seconds, it’s high heat. Four seconds suggests medium heat, and six seconds is low heat.
| Food Item | High Heat Time | Medium Heat Time | Low Heat Time |
| Burgers | 2-3 minutes per side | 4-5 minutes per side | Not recommended |
| Chicken breasts | 5-6 minutes per side | 8-10 minutes per side | 25-30 minutes total |
| Veggie skewers | 2-3 minutes per side | 5-6 minutes per side | 10-12 minutes total |
Understanding Meat Cuts
Different cuts of meat require unique approaches to grilling. Here’s a simple guide:
- Thick Cuts: Steaks thicker than an inch need lower heat for longer times after an initial sear. This ensures the inside cooks without burning the outside.
- Thin Cuts: Items like skirt steaks cook fast on high heat. Keep them moving to avoid overcooking.
- Bone-in Meats: These take longer to cook. Use a thermometer to check doneness without cutting into the meat.
Remember, every grill is different. Start with these guidelines and adjust as you learn your grill’s personality. Keep notes on times and temperatures for different meats to create your custom grilling playbook. Here’s a quick reference for common meats:
| Meat Cut | Thickness | Recommended Temp. | Approx. Cooking Time |
| Ribeye Steak | 1 inch | Medium-High | 4-5 minutes per side |
| Pork Chops | 1/2 inch | Medium | 5-7 minutes per side |
| Chicken Thighs | Bone-in | Medium | 10-12 minutes per side |
Troubleshooting Temperature Issues
When you’re facing temperature issues, it’s crucial to pinpoint the problem quickly and adjust accordingly. Let’s dive into the common troubles and their quick fixes to keep your grilling game strong.
Common Problems
Temperature control on a charcoal grill can be tricky. Novice grillers often face challenges that can throw a barbecue off course. These issues range from:
- Fire Won’t Start: Too much ash from previous grilling sessions can suffocate new coals.
- Temperature Too High: This may result from too much oxygen feeding the flames.
- Temperature Too Low: Possibly due to insufficient charcoal or blocked air vents.
- Temperature Fluctuations: Sudden gusts of wind or frequent lid lifting can cause this.
Each of these problems can affect the outcome of your food, leading to undercooked or overcooked meals.
| Problem | Possible Cause | Impact on Grilling |
| Fire Won’t Start | Ash Buildup | Delays cooking |
| Temperature Too High | Excess Oxygen | Burns food |
| Temperature Too Low | Not enough charcoal or closed vents | Undercooks food |
| Temperature Fluctuations | Wind or lid lifting | Uneven cooking |
Quick Fixes
Don’t let temperature issues derail your grilling! Here are some quick solutions:
- For a Fire That Won’t Start: Remove old ash before lighting new charcoal. Use a chimney starter for a more reliable flame.
- If the Temperature is Too High: Close the vents slightly to reduce oxygen flow. Move food to cooler areas of the grill.
- For Low Temperature: Open the vents to increase air circulation. Add more charcoal if necessary.
- When Temperature Fluctuates: Shield your grill from the wind. Open and close the lid only when needed.
By closely monitoring the grill and making these adjustments, you maintain the right temperature for cooking your food to perfection. Remember, practice makes perfect. The more you grill, the better you’ll get at these temperature tweaks.
- Monitor: Keep an eye on the temperature gauge, if available.
- Adjust: Tweak the vent openings for better heat control.
- Add Fuel: Carefully add more coals as needed.
- Patience: Give the grill time to reach the desired temperature.
Frequently Asked Questions
How Do You Adjust The Temperature On A Charcoal Grill?
To adjust the temperature on a charcoal grill, control the air flow: open vents to increase heat, close them to reduce it. Use more charcoal for higher temperatures and spread coals out for even cooking. Always monitor and make adjustments as needed for consistent grilling temperatures.
How Do You Keep A Charcoal Grill At 225?
To keep a charcoal grill at 225 degrees, start by establishing a two-zone fire. Place coals on one side. Adjust the vents to control airflow; less air lowers the temperature. Monitor with a grill thermometer and add coals every hour to maintain consistent heat.
How Do You Keep A Charcoal Grill At 350?
To maintain 350 degrees on a charcoal grill, start with a thermometer to monitor the temperature. Adjust the air vents—open them to raise heat, partially close to lower it. Add charcoal periodically to maintain heat, and use a grill cover to stabilize the temperature.
Does Closing The Vent On A Charcoal Grill Make It Hotter?
Closing the vent on a charcoal grill reduces oxygen flow, which lowers the temperature. To increase heat, keep the vent open.
Conclusion
Mastering charcoal grill temperature control is key for perfect cookouts. Start with the basics. Use vents and lid placement to manage the heat. Keep a close eye on your thermometer; it’s your best guide. Practice makes perfect. Each grilling session is a chance to improve.
Remember these tips and you’ll be grilling like a pro in no time. Happy grilling!