Every product is independently reviewed and selected by our editors. If you buy something through our links, we may earn an affiliate commission at no extra cost to you.
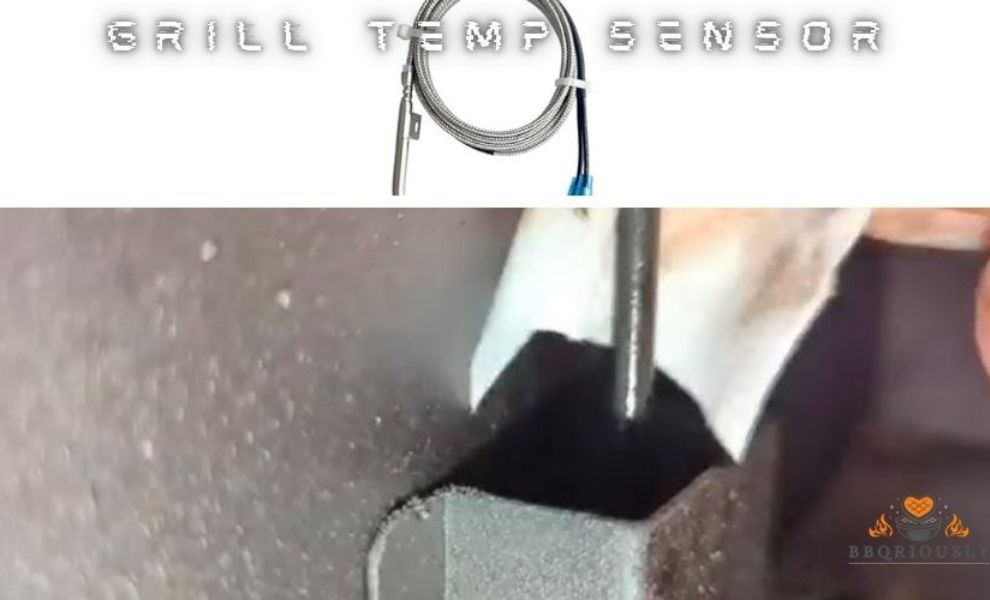
Perfect grilling depends on precise temperature control—and that’s exactly what a grill temp sensor delivers. The right sensor helps your meat cook evenly, lock in juiciness, and avoid the pitfalls of being underdone or dried out.
With so many choices on the market, however, finding the right one can be challenging. Before you buy, it’s important to understand the key features, sensor types, and how to match the right model to your grilling style.
Grill Temp Sensor: Ultimate Guide to Perfect BBQ Every Time
Grill Temp Sensor: Ultimate Guide to Perfect BBQ Every Time
Types Of Grill Temp Sensors
Grill temp sensors help measure the heat inside your grill to cook food perfectly. They show the exact temperature, so you avoid undercooking or burning.
Different types of grill temp sensors suit different grilling styles and needs. Choosing the right sensor makes your grilling easier and more precise. Below are the main types of grill temp sensors used by many grillers.
Wired Sensors
Wired sensors are the classic choice for many grillers. They use a metal probe connected by a wire to a digital or analog display. The probe goes inside the meat or grill to measure the temperature directly.
Benefits of wired sensors:
- Accurate temperature readings because the probe is inside the meat.
- Stable connection without interference from other devices.
- Generally affordable and easy to find.
Some drawbacks include limited mobility because the wire can get in the way. The wire length also limits how far you can move from the grill. Careful handling is needed to avoid breaking the wire or probe.
| Feature | Wired Sensors |
| Accuracy | High |
| Range | Limited by wire length |
| Price | Low to moderate |
| Ease of Use | Simple but less mobile |


Wired sensors work best for those who stay close to the grill and want precise readings. They suit slow cooking and smoking where constant monitoring is key.
Wireless Sensors
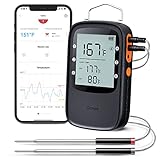
Wireless sensors offer freedom and convenience. They use Bluetooth or Wi-Fi to send temperature data to your smartphone or a remote monitor. No wires limit your movement around the grill or backyard.
Main advantages of wireless sensors:
- Remote monitoring from a distance, even inside your house.
- Easy to use apps that show graphs and alerts.
- Multiple probes can connect to one device, tracking different foods.
Wireless sensors often cost more than wired ones. Battery life can be a concern, needing regular charging or replacements. Signal interference can happen with many wireless devices nearby.
| Feature | Wireless Sensors |
| Accuracy | High, but depends on probe quality |
| Range | Up to 300 feet (varies) |
| Price | Moderate to high |
| Ease of Use | Very convenient and mobile |
Wireless sensors fit those who want to relax away from the grill but still watch cooking progress. They also work well for busy outdoor events.
Infrared Sensors
Infrared sensors measure temperature without touching the food. They use light waves to detect heat on the surface. You point the sensor at the grill or meat, and it shows the temperature instantly.
Key features of infrared sensors:
- Non-contact measurement avoids piercing the food.
- Fast results in seconds.
- Good for checking grill surface or cooking zones.
Infrared sensors do not measure internal meat temperature. This limits their use for precise cooking. Surface temperature can differ from inside, so they are best for quick checks or grilling zones.
| Feature | Infrared Sensors |
| Accuracy | Good for surface, not internal |
| Range | Instant, line of sight |
| Price | Moderate |
| Ease of Use | Quick and simple |

Infrared sensors suit grillers who want fast surface temperature info. They help manage hot spots on the grill but are not for checking meat doneness.
How Grill Temp Sensors Work
Grill temperature sensors play a crucial role in cooking food perfectly. They measure the heat inside the grill and send this data to a display or controller. This helps you keep track of the cooking temperature without opening the grill.
Understanding how these sensors work can improve your grilling experience and help you avoid undercooked or burnt food. Let’s explore the main parts of how grill temp sensors function.
Temperature Detection Methods
Grill temperature sensors use different ways to detect heat. The most common methods include:
- Thermocouples:These sensors use two different metals joined together. When heated, they produce a small voltage that changes with temperature.
- Thermistors:Made of semiconductor materials, thermistors change their resistance as the temperature changes.
- Infrared Sensors:These detect heat by measuring the infrared radiation emitted from the grill or food.
Each method has pros and cons. Here is a simple comparison:
| Method | Accuracy | Response Time | Durability | Cost |
| Thermocouple | High | Fast | High | Moderate |
| Thermistor | Moderate | Moderate | Moderate | Low |
| Infrared Sensor | Variable | Fast | Low | High |
Thermocouples are popular in grills because they handle high heat well. Thermistors work best for moderate temperatures. Infrared sensors can read temperature without contact but may be affected by smoke or steam.
Signal Transmission
After detecting temperature, the sensor sends this information to a display or control unit. The signal transmission can happen in several ways:
- Wired Transmission:The sensor uses wires to send electrical signals. This method is reliable and common in most grills.
- Wireless Transmission:Some modern grills use Bluetooth or Wi-Fi to send temperature data to smartphones or remote displays.
Wired signals often use analog or digital formats. Analog signals vary in voltage or current, representing temperature levels. Digital signals convert temperature into numbers that are easier for controllers to read accurately.
Wireless signals offer freedom but need power and can face interference. Wired systems are simple and stable but limit placement options.
| Transmission Type | Advantages | Disadvantages |
| Wired | Stable, low interference, low cost | Limited range, wires can wear out |
| Wireless | Flexible placement, remote monitoring | Needs battery/power, potential interference |
Once the signal reaches the grill’s control unit, it processes the data. The control unit may adjust the heat source automatically or show the temperature on a screen.
Choosing The Right Sensor
Choosing the right grill temperature sensor is key for perfect cooking. The sensor helps track the heat inside your grill precisely. Picking a good sensor makes grilling easier and safer. It ensures your food cooks evenly and avoids burning or undercooking.
Many sensors are available, but not all fit every grill or meet your needs. Consider several factors before buying to get the best results. The right sensor suits your grill, reacts quickly, and lasts through many cookouts.
Compatibility With Grill Types
Grills come in different styles: gas, charcoal, electric, and pellet. Each type has unique heat zones and designs. A temperature sensor must work well with your grill type for accurate readings.
- Gas grills:Sensors should handle high heat and fit into existing ports or openings.
- Charcoal grills:Sensors need to resist ash and soot without damage.
- Electric grills:Sensors must connect easily to digital controls or apps.
- Pellet grills:Sensors should support long cooking times and fluctuating temperatures.
Check the sensor’s compatibility before purchase. Some sensors come with adapters or universal fittings. Others are brand-specific and only fit certain grill models.
| Grill Type | Sensor Features Needed | Example Sensor Types |
| Gas | High heat resistance, port fitting | Probe sensors, built-in wireless |
| Charcoal | Ashproof, heat-resistant casing | Wireless probes, magnetic sensors |
| Electric | App connectivity, digital display | Smart sensors, USB probes |
| Pellet | Long battery life, stable reading | Bluetooth probes, wireless units |
Matching the sensor to your grill ensures better performance and longer life.
Accuracy And Response Time
Accurate temperature readings prevent overcooking or undercooking. Fast response time means the sensor shows changes quickly. This helps adjust the grill heat instantly.
Sensors use different technologies like thermocouples or thermistors. Thermocouples work well at very high temperatures and react fast. Thermistors offer good accuracy at moderate heat.
- Accuracy:Look for sensors with ±1°F or ±2°F accuracy.
- Response time:Faster than 5 seconds is ideal.
- Calibration:Some sensors allow recalibration for precise results.
Here is a comparison of common sensor types:
| Sensor Type | Accuracy | Response Time | Best Use |
| Thermocouple | ±1°F | 2-3 seconds | High heat grilling |
| Thermistor | ±2°F | 4-5 seconds | General cooking |
| Infrared | ±3°F | Instant | Surface temperature |
Choose a sensor with quick response and tight accuracy for best results. This keeps your food cooked just right every time.
Durability And Weather Resistance
Grills are used outdoors and face sun, rain, heat, and cold. A durable sensor withstands these conditions without breaking or losing accuracy.
Look for sensors with strong, heat-resistant cables and waterproof or water-resistant bodies. Stainless steel probes resist rust and corrosion. Sensors with protective coatings last longer in harsh weather.
- Water resistance:IPX4 or higher rating protects against splashes and rain.
- Heat resistance:Probes should handle at least 600°F or more.
- Build quality:Thick cables and solid connectors reduce damage risk.
Consider storage options too. Sensors with carrying cases or protective sleeves stay safe when not in use.
Here is a checklist for sensor durability:
- Waterproof or water-resistant design
- Heat-tolerant probe material
- Strong cable insulation
- Rust-resistant metal parts
- Shock and drop resistant housing
Choosing a rugged sensor keeps your grill tool reliable season after season.
Installing Grill Temp Sensors
Grill temperature sensors help cook food perfectly by showing the exact heat inside the grill. Installing grill temp sensors is simple and improves your grilling results. Proper installation ensures accurate readings and better control over cooking. This section explains how to place sensors correctly and connect them to your devices for easy monitoring.
Placement Tips
Correct placement of grill temp sensors is key for reliable temperature readings. Place the sensor probe where it can measure the heat near the food, not too close to flames or grill walls. Avoid areas with direct flame contact, as this can damage the sensor or give false readings.
- Insert the probe into the thickest part of the meat to get an accurate internal temperature.
- Keep the sensor away from direct flames to prevent overheating and sensor damage.
- Place the sensor probe where air circulates to measure the grill’s ambient temperature well.
- Secure the sensor cable so it does not touch hot surfaces or get tangled.
Use this table as a quick guide for sensor placement:
| Location | Recommended | Reason |
| Inside thick meat | Yes | Measures food’s internal temperature |
| Near grill wall | No | May give inaccurate readings |
| Above grill grate, away from flame | Yes | Measures ambient grill temperature |
| Direct flame contact | No | Can damage sensor |
Connecting To Devices
Connecting grill temp sensors to devices allows easy temperature tracking during cooking. Most sensors work with Bluetooth or Wi-Fi to send data to smartphones or tablets. Follow the instructions in the sensor manual for pairing your device smoothly.
Basic steps for connecting your grill temp sensor:
- Turn on the sensor and your smartphone’s Bluetooth or Wi-Fi.
- Open the sensor’s app or compatible temperature app.
- Search for the sensor device in the app.
- Select the sensor and pair it with your phone.
- Test the connection by checking temperature updates.
Use this checklist for a stable connection:
- Keep your phone near the grill to maintain signal strength.
- Charge sensor batteries before grilling to avoid interruptions.
- Update the app and sensor firmware for best compatibility.
- Follow device-specific instructions carefully for a smooth setup.
With proper connection, you can monitor grill temps remotely. This helps avoid overcooking and keeps your food juicy and safe.
Maintaining And Calibrating Sensors
Grill temperature sensors play a vital role in cooking meat perfectly and safely. Maintaining and calibrating these sensors keeps them accurate and extends their life. Dirt, grease, and heat can affect sensor readings. Regular care ensures the sensor works well every time you grill.
Cleaning Procedures
Cleaning the grill temperature sensor is simple but important. A dirty sensor gives false readings, which can ruin your food. Follow these steps to clean the sensor safely:
- Turn off the grill and disconnect the sensor before cleaning.
- Use a soft cloth or sponge dampened with warm, soapy water.
- Gently wipe the sensor probe to remove grease and food particles.
- Avoid harsh chemicals or abrasive materials that can damage the sensor.
- Rinse the cloth with clean water and wipe the sensor again to remove soap.
- Let the sensor air dry completely before reconnecting it to the grill.
Here is a simple cleaning checklist for your grill temp sensor:
| Step | Action | Notes |
| 1 | Power off grill | Ensure safety |
| 2 | Wipe sensor with soapy cloth | Remove grease and dirt |
| 3 | Rinse with clean cloth | Remove soap residue |
| 4 | Air dry | Prevent moisture damage |
Cleaning your sensor every few uses keeps it working well. Avoid soaking the sensor in water to protect its electronics.
Calibration Techniques
Calibration ensures your grill temp sensor reads the correct temperature. Sensors can lose accuracy after time or heavy use. Here are easy ways to calibrate it:
- Ice water test:Fill a glass with ice and water. Insert the sensor probe and wait 30 seconds. The sensor should read close to 32°F (0°C).
- Boiling water test:Boil water and place the sensor probe inside carefully. It should read near 212°F (100°C) at sea level.
Note temperature differences can happen due to altitude or sensor quality. If readings vary by more than 5°F, adjust the sensor or replace it.
Many digital grills allow calibration through settings. Follow your grill’s manual to adjust the sensor offset if needed.
Use this table to check your sensor’s accuracy:
| Test | Expected Reading | Action if Off |
| Ice Water | 32°F (0°C) | Adjust offset or clean sensor |
| Boiling Water | 212°F (100°C) | Recalibrate sensor settings |
Regular calibration keeps grilling precise. Check sensor accuracy every few months or after heavy use.
Common Issues And Troubleshooting
The grill temperature sensor plays a key role in cooking food evenly and safely. It measures the heat inside the grill and sends this data to the control panel.
Despite its importance, the sensor can face common issues that affect its accuracy and function. Understanding these problems helps in quick troubleshooting and keeps your grill working well. Below are some frequent issues and steps to fix them.
Signal Interference
Signal interference happens when the grill temp sensor’s communication with the control unit gets disrupted. This causes incorrect temperature readings or loss of signal. Interference usually comes from electronic devices or environmental factors near the grill.
Common causes of signal interference include:
- Nearby wireless devices like cell phones or routers
- Metal objects blocking the sensor’s signal path
- Electrical wiring or appliances causing electromagnetic interference
- Distance between the sensor and the receiver being too far
To reduce interference, try these tips:
- Move electronic devices away from the grill area.
- Keep metal objects out of the sensor’s direct line of sight.
- Shorten the distance between the sensor and the control unit.
- Use shielded cables if available for wired sensors.
| Interference Cause | Effect | Solution |
| Wireless devices | Signal disruption, wrong readings | Move devices away |
| Metal objects | Signal blockage | Clear line of sight |
| Electromagnetic interference | Sensor communication failure | Use shielded cables |
| Long distance | Weak signal | Reduce distance |
Sensor Malfunctions
Sensor malfunctions cause wrong temperature readings or no readings at all. These problems occur due to physical damage, dirt, or internal sensor faults. Regular use and exposure to heat can wear the sensor out over time.
Signs of sensor malfunctions include:
- Temperature stays the same despite changes in grill heat
- Sensor shows error codes or no signal on the display
- Inconsistent or fluctuating temperature readings
- Physical damage such as frayed wires or bent probe
Steps to troubleshoot sensor malfunctions:
- Inspect the sensor probe for dirt or grease. Clean it gently with a soft cloth.
- Check wires for breaks, cuts, or loose connections.
- Test the sensor with a multimeter to check resistance values. Compare with manufacturer specs.
- Replace the sensor if it shows physical damage or fails testing.
- Ensure the sensor is properly inserted into the grill meat or heat zone.
| Problem | Possible Cause | Troubleshooting Step |
| Constant temperature reading | Sensor failure or stuck probe | Clean and test sensor |
| Error codes on display | Sensor communication error | Check connections and replace if needed |
| Fluctuating temperature | Loose wires or damaged sensor | Secure wires, inspect probe |
Enhancing Grilling With Temp Sensors
Grilling is an art that depends on precise heat and timing. Using a grill temperature sensorhelps improve this process. These sensors offer exact readings of the grill and meat temperatures. They make cooking easier and ensure food is cooked perfectly. This technology brings control and confidence to the grill master’s hands. It reduces guesswork and avoids overcooking or undercooking meat.
Monitoring Meat Doneness
Meat doneness is the key to a great meal. A grill temp sensor helps track the exact temperature inside the meat. This shows when the meat reaches the right doneness level. Different meats need different internal temperatures to be safe and tasty. For example, poultry must reach 165°F, while beef steaks vary from 125°F (rare) to 160°F (well done).
Benefits of monitoring meat doneness with a temp sensor:
- Consistent cooking results every time
- Prevents dry or undercooked meat
- Keeps food safe by reaching proper temperatures
- Helps achieve desired texture and flavor
Here is a simple guide for common meat temperatures:
| Meat Type | Doneness Level | Internal Temperature (°F) |
| Beef Steak | Rare | 125 |
| Beef Steak | Medium | 135 |
| Chicken | Well Done | 165 |
| Pork | Well Done | 145 |
Using a temperature sensor removes the need to cut the meat to check. It keeps juices inside and improves taste. This tool is perfect for beginners and experts alike.
Remote Temperature Tracking
Remote temperature tracking means checking grill and meat heat without standing near the grill. Many modern grill temp sensors connect to smartphones via apps. This lets users watch temperatures from a distance.
Advantages of remote tracking:
- Allows multitasking without fear of burning food
- Provides alerts when food reaches target temperature
- Helps keep food at a safe temperature after cooking
- Reduces risk of flare-ups by monitoring grill heat
Remote sensors usually come with features like:
- Real-time temperature updates
- Custom temperature settings
- Multiple probe support for different meats
- Timer and alarm functions
Here is a basic example of how remote temperature tracking works:
Sample code to connect a sensor to an app
connectSensor(‘grillSensor123’);
startMonitoring();
onTemperatureChange(temp) {
if (temp >= targetTemp) {
sendAlert(‘Temperature reached!’);
}
}
This technology helps grillers stay relaxed. They enjoy the party or other tasks without losing track of the food.
Frequently Asked Questions
What Is A Grill Temp Sensor And How Does It Work?
A grill temp sensor measures the internal temperature of your grill or food. It sends real-time data to your grill’s control panel or smartphone app, ensuring precise cooking and preventing over or undercooking.
Why Is A Grill Temp Sensor Important For Cooking?
A grill temp sensor ensures accurate temperature control. It helps maintain consistent heat, improving food quality and safety. This prevents guesswork and delivers perfectly cooked meals every time.
How Do I Install A Grill Temp Sensor Correctly?
To install, place the sensor probe in the thickest part of the meat or grill grate. Connect the sensor to your grill’s control unit. Follow manufacturer instructions for proper placement and calibration.
Can A Grill Temp Sensor Work With All Grill Types?
Most grill temp sensors are compatible with gas, charcoal, and electric grills. Always check the sensor’s specifications to ensure compatibility with your grill model before purchase.
Conclusion
A grill temp sensor helps you cook food just right every time. It keeps track of heat inside the grill. This stops food from getting burnt or undercooked. Using one saves time and makes grilling easier. You get tasty meals without guessing the temperature.
A small tool that brings big benefits to your grill. Try adding a temp sensor to your setup for better results. Enjoy cooking with confidence and less stress.