Every product is independently reviewed and selected by our editors. If you buy something through our links, we may earn an affiliate commission at no extra cost to you.
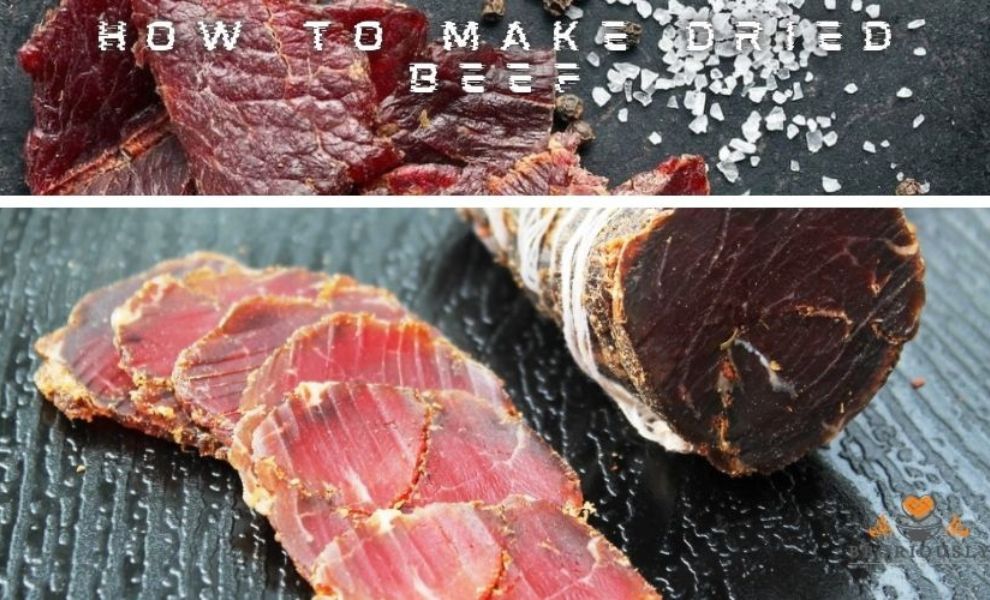
Drying beef extends its shelf life and adds a unique flavor. This technique has been used for centuries.
Dried beef, a staple in many cultures, is both a culinary art and a practical food preservation method.
The process is simpler than you might think and requires minimal equipment. With a bit of patience and attention to detail, anyone can create this delicious and enduring food product.
How To Make Dried Beef: Easy, Delicious DIY Jerky Guide
Turn fresh beef into flavorful, protein-packed jerky with this simple DIY guide. No fancy tools—just easy steps and delicious results!
Choosing The Right Cut
Making dried beef is a rewarding process that starts with a critical step: selecting the right cut of meat. This choice determines the flavor, texture, and overall quality of the final product. It’s essential to understand which cuts are best suited for drying and what factors to consider during selection to ensure delicious, homemade dried beef.
Best Cuts For Drying
For top-notch dried beef, lean and consistent cuts are key. Excess fat can spoil the drying process, so opting for leaner options is advisable. Here are some of the best cuts for drying:
- Eye of Round: This cut is popular due to its low-fat content and uniform shape, making it an ideal candidate for even drying.
- Top Round: Also known as the inside round, this cut offers a good balance of flavor and leanness.
- Bottom Round: Slightly tougher than top round, but still a great choice when properly trimmed.
- Sirloin Tip: Lean and flavorful, the sirloin tip is a premium choice for those seeking a higher-end dried beef.
Consider the following table for a quick reference on cut selection:
| Cut | Fat Content | Texture After Drying |
| Eye of Round | Low | Even and tender |
| Top Round | Moderate | Flavorful and chewy |
| Bottom Round | Moderate | Rich and slightly tougher |
| Sirloin Tip | Low | Delicate and soft |
Factors To Consider
When choosing the right cut for drying beef, consider these factors:
- Grain: Look for cuts with a straight grain, which makes slicing easier and results in a better texture.
- Marbling: While some marbling is beneficial for flavor, too much can lead to spoilage. Aim for minimal marbling.
- Size and Shape: Uniform cuts ensure even drying. Uneven cuts can lead to parts that are either over or under-dried.
- Freshness: Fresh cuts are best. Check for a bright red color and a firm texture to ensure quality.
- Price: Balance your budget with quality. While premium cuts are tempting, less expensive cuts can also produce excellent results when handled correctly.
Remember that the right cut makes all the difference. It affects drying time, flavor, and the overall enjoyment of your homemade dried beef. Take your time to choose wisely and enjoy the process!
Preparation Steps
Embarking on the journey to make dried beef, also known as beef jerky, requires patience and attention to detail. The preparation steps are crucial to achieving that perfect balance of flavor and texture.
This guide will walk you through the essential stages of preparing the meat before it undergoes the drying process. From trimming the beef to marinating it with the right blend of spices, each step contributes to the final delicious product.
Trimming The Meat
Starting with a high-quality cut of beef is vital. Look for lean cuts like eye of round, top round, or sirloin tip. Fat does not dry well and can cause your jerky to spoil faster. Here’s how to trim the meat properly:
- Chill the beef: Slightly freezing the beef makes it easier to handle. Aim for a semi-frozen texture for precise cuts.
- Remove the fat: Use a sharp knife to trim away any visible fat. Be thorough but careful not to waste any meat.
- Slice against the grain: Cutting against the grain ensures a tender bite. Aim for slices about 1/4 inch thick for even drying.


Proper trimming is summarized in the table below for a quick reference:
| Step | Action | Tip |
| 1 | Chill beef | Freeze until semi-frozen for easy slicing. |
| 2 | Trim fat | Remove all visible fat to prevent spoilage. |
| 3 | Slice meat | Cut against the grain, slices 1/4 inch thick. |
Marinating Techniques
Marinating infuses the beef with flavors and tenderizes it for the perfect jerky. Follow these steps to create a flavorful marinade:
- Select your base: Soy sauce or Worcestershire sauce are great starting points for a rich flavor.
- Add sweeteners: Ingredients like brown sugar or honey balance the savory notes.
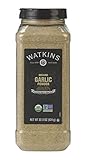
- Include spices: Garlic powder, onion powder, and black pepper are classics. Feel free to experiment.
- Consider heat: Red pepper flakes or hot sauce add a kick for those who like it spicy.
- Don’t forget the cure: A curing salt can help preserve the beef and prevent bacteria growth.
Once your marinade is ready, submerge the beef slices completely. Marinate for at least 4 hours, though overnight is best. This ensures deep flavor penetration. Keep everything refrigerated during this step to keep the meat safe. Remember, a good marinade makes a great jerky!
Drying Methods
Making dried beef is simple and rewarding. It involves drying beef to remove moisture. This process preserves the beef, making it last longer and taste great. There are two popular methods for drying beef: using a dehydrator and oven drying. Both methods have their unique steps and requirements. Let’s dive into how each method works.
Using A Dehydrator
Using a dehydrator is a straightforward way to make dried beef. First, you need to prepare the beef. Slice it thin for the best results. Here’s a simple guide:
- Choose the right beef: Lean cuts work best. Try eye of round or sirloin.
- Slice the beef: Thin slices dry faster and more evenly.
- Season: Add your favorite spices to enhance flavor.

After preparing the beef, arrange the slices on the dehydrator trays. Make sure they do not overlap. Next, set the dehydrator to the right temperature. Around 160°F (71°C) is ideal for beef. Drying time can vary, but it generally takes about 4-8 hours. Check the beef regularly. You want it to be dry but still flexible.
| Step | Action |
| 1 | Prepare and season beef |
| 2 | Arrange on dehydrator trays |
| 3 | Set temperature and time |
| 4 | Check and store |
Oven Drying
If you don’t have a dehydrator, you can use your oven. Oven drying is also effective for making dried beef. Start by prepping the beef just like for the dehydrator. Then, follow these steps:
- Preheat oven: Set your oven to the lowest temperature, around 170°F (77°C) works well.
- Prepare a baking sheet: Line it with parchment paper for easy cleanup.
- Arrange beef: Place beef slices on the baking sheet without overlapping.
- Oven door: Keep it slightly open to allow moisture to escape.
Drying in the oven takes about 4-6 hours, but it could vary. Check the beef every hour to ensure it dries evenly. Once dry, the beef should be leathery but not brittle. Let it cool before storing in an airtight container.
| Step | Action |
| 1 | Preheat oven and prepare baking sheet |
| 2 | Arrange beef on sheet |
| 3 | Keep oven door ajar |
| 4 | Check, cool, and store |
Both methods are great for making dried beef. Choose based on what equipment you have and your preference. Enjoy your homemade dried beef as a snack or add it to recipes!
Seasoning Options
Crafting your own dried beef is a rewarding endeavor that allows for a wealth of creativity, especially when it comes to seasoning. The right blend of spices can transform simple beef into a savory treat that tantalizes the taste buds.
In the following sections, we’ll delve into the various spices you can use and how to create unique flavor profiles that will set your dried beef apart.
Spices To Use
Selecting the perfect spices is key to making exceptional dried beef. Start with quality salt – it’s the foundation of any good cure. Then consider the following spices to elevate your dried beef:
- Black Pepper: Adds a classic, spicy kick.
- Garlic Powder: Brings a warm, savory note.
- Onion Powder: Delivers a subtle, aromatic sweetness.
- Paprika: Offers a touch of smokiness and color.
- Coriander: Introduces a hint of citrus and spice.
- Mustard Powder: Gives a tangy, sharp flavor.
- Thyme: Infuses the beef with a herby, floral taste.


Consider this table for easy reference when preparing your mix:
Add more rows as needed
| Spice | Flavor Profile | Quantity (per lb of beef) |
| Salt | Essential curing agent | 1 tbsp |
| Black Pepper | Spicy, sharp | 1 tsp |
| Garlic Powder | Warm, savory | 1/2 tsp |
Feel free to experiment with the quantities to suit your taste buds. Remember, the goal is to complement the beef’s natural flavors, not overpower them.
Creating Unique Flavors
Once you have the basics down, you can start getting creative. Unique flavors make your dried beef stand out. Try these tips for a one-of-a-kind batch:
- Mix Up the Salts: Use smoked salt or pink Himalayan salt for a twist.
- Add Sweetness: A touch of brown sugar or honey balances the salt.
- Go Global: Incorporate spice blends like Garam Masala or Herbes de Provence.
- Heat Things Up: Chili flakes or cayenne pepper bring fiery heat.
Experiment with these combinations for starters:
- Mediterranean Magic: Olive oil, lemon zest, oregano, and sea salt.
- Sweet and Spicy: Brown sugar, chipotle powder, and a pinch of cinnamon.
- Asian Zing: Soy sauce, ginger, garlic, and a hint of five-spice.
The key is to let your imagination run wild. Think about your favorite cuisines and flavors. Then, mix and match to create a signature seasoning. Always taste test your spice mix before curing the entire batch. This way, you can adjust and perfect your recipe. Your homemade dried beef will not only be delicious but also a reflection of your personal taste.
Safety Tips
Creating delicious dried beef is a journey that starts with careful preparation and ends with safe storage. Safety is key in this process. It’s important to keep your beef free from spoilage and bacteria. This will ensure that your efforts result in a tasty and safe product. Let’s dive into how to keep your beef in top condition from start to finish.
Preventing Spoilage
Making dried beef requires a keen eye for detail, especially when it comes to preventing spoilage. The goal is to remove moisture that bacteria love. Here are some safety tips to keep in mind:
- Choose the Right Cut: Lean meats with minimal fat are best for drying. Fat can go rancid, so trim any excess off.
- Cure Properly: Use a curing mix of salt and nitrates. This helps prevent bacteria growth during the drying process.
- Consistent Drying Temperature: Keep your drying environment between 130°F to 140°F. This is the sweet spot for drying beef without cooking it.
- Avoid Humidity: Dry air is crucial. Too much humidity can encourage mold and bacteria growth.
- Sanitize Everything: Before you start, clean all surfaces and tools. This includes knives, cutting boards, and dehydrator trays.
Here’s a quick glance at the optimal conditions for drying beef:
| Condition | Recommendation |
| Temperature | 130°F to 140°F |
| Humidity | Below 60% |
| Cure Time | Follow recipe instructions |
| Sanitization | Clean all equipment before use |
Follow these steps and you’ll be well on your way to preventing spoilage in your dried beef.
Storage Guidelines
Once your beef is dried, storing it correctly is crucial for maintaining its quality and safety. Here are some guidelines to follow:
- Keep It Cool: Store dried beef in a cool, dark place. Your pantry or a cupboard away from direct sunlight works well.
- Air-Tight Containers: Use vacuum-sealed bags or air-tight containers. This keeps moisture and pests out.
- Monitor for Freshness: Check your dried beef regularly. Look for any signs of spoilage or off-odors.
- Refrigeration: For longer storage, keep the beef in the refrigerator. This slows down any potential bacterial growth.
- Freezing: For the longest shelf life, freeze dried beef. It can last several months in the freezer if sealed properly.
Here’s a storage cheat sheet to help you remember:
| Storage Type | Location | Expected Shelf Life |
| Pantry | Cool, Dark Place | 1-2 Months |
| Refrigerator | Below 40°F | 2-6 Months |
| Freezer | 0°F or Below | 6 Months to 1 Year |
Stick to these storage guidelines, and you’ll enjoy your homemade dried beef for a good while. Safe handling and storage are as important as the drying process itself. Take these steps, and enjoy your delicious, homemade dried beef with peace of mind.
Texture And Quality
Making dried beef involves more than just drying meat. It’s about creating a texture and quality that feels good to eat. The right texture makes the beef enjoyable, while the quality ensures it’s safe and delicious. Let’s dive into how to achieve this.
Achieving The Right Consistency
To get dried beef just right, understanding the drying process is key. Here’s a simple guide:
- Start with quality meat: Choose lean cuts for best results.
- Slice it thin: Thin slices dry evenly and eat well.
- Marinate for flavor: A good marinade adds taste and aids in preservation.
- Control the environment: Dry in a cool, dry place with good air flow.
Patience is crucial. Rushing can ruin the texture. The meat should feel firm but not hard, and definitely not rubbery. It’s a balance between too dry and not dry enough.
| Texture | Consistency |
| Firm | Just right |
| Hard | Too dry |
| Rubbery | Not dry enough |
Signs Of Proper Drying
Knowing when your beef is perfectly dried is important. Look for these signs:
- Color: It should be a uniform dark color, not too light or too dark.
- Texture: The beef should be firm to the touch.
- Smell: It should have a rich, meaty aroma, not sour or off.
Remember, the drying process varies depending on conditions like humidity and temperature. So, keep an eye on your beef as it dries. Use a dehydrator for more controlled drying. This helps maintain consistent quality.
Finally, store your dried beef properly. Keep it in an airtight container in a cool, dark place. This way, it stays good to eat for longer. Enjoy the fruits of your labor as a tasty snack or part of a meal.
Serving Suggestions
Creating delicious dried beef at home is a rewarding step into the world of traditional food preservation. Once you’ve perfected the process, the real fun begins—discovering all the flavorful and creative ways to serve it. From snacks to main dishes, here are some tasty ideas to enjoy your homemade dried beef.
Snack Ideas
Dried beef shines as a snack, both for its flavor and ease of serving. Here are some snack ideas that highlight its rich taste and texture:
- Beef Jerky Sticks: Slice your dried beef into thin sticks for a portable and protein-rich snack.
- Cheese Platters: Pair with sharp cheeses like cheddar or gouda for a classic flavor combination.
- Crackers and Dips: Offer a variety of dips such as cream cheese or horseradish sauce to complement the beef’s robust taste.
For a more visual and organized snack presentation, consider the following table:
| Snack Type | Suggested Pairing |
| Dried Beef Slices | Mustard or Aioli Dip |
| Beef Jerky Sticks | Assorted Nuts |
| With Cheese | Grapes or Apple Slices |
These snack options are not only tasty but also easy to prepare. They make a great choice for any occasion.
Pairing With Other Foods
When it comes to meals, dried beef can be a standout addition. Here are some pairing ideas:
- Salads: Chop and sprinkle over greens for added texture and flavor.
- Pasta: Mix into creamy sauces for a salty, savory boost.
- Soups: Use as a garnish for hearty stews or bean soups.
If you’re planning a full meal, the following pairings can elevate your dining experience:
| Main Dish | Dried Beef Pairing |
| Caesar Salad | Shredded Dried Beef |
| Fettuccine Alfredo | Diced Dried Beef |
| Vegetable Soup | Dried Beef Strips |
These combinations bring out the best flavors in both the dried beef and the accompanying dish. The result is a satisfying meal that’s both simple and sophisticated.
Troubleshooting Common Issues
Drying beef is a time-honored way to preserve and enjoy meat. Yet, sometimes things don’t go as planned. You might find your beef too moist, too dry, or oddly flavored. Don’t worry! Let’s tackle these common drying beef issues and get you back on track for creating delicious dried beef.
Addressing Drying Problems
When drying beef, you aim for a perfect texture that’s neither too moist nor over-dried.
Here are some tips to fix drying issues:
- Uneven Drying: Rotate your meat regularly to ensure even exposure to air or heat. Use a dehydrator with a fan for best results.
- Too Much Moisture: Increase drying time and make sure your environment is not too humid. A dehumidifier can help in damp climates.
- Over-Drying: Reduce the heat and drying time. Remember, thicker slices take longer to dry.
Use this table as a quick reference for troubleshooting drying issues:
| Problem | Cause | Solution |
| Uneven Drying | Poor air circulation | Rotate regularly, use a fan |
| Too Moist | High humidity or low heat | Extend drying time, use a dehumidifier |
| Over-Dried | Too much heat or time | Lower heat, shorten drying time |
Remember, the thickness of your beef slices greatly affects drying time. Aim for consistent thickness to avoid these problems.
Fixing Flavor Mistakes
The right blend of flavors is crucial for delicious dried beef. If your beef doesn’t taste quite right, consider these fixes:
- Too Salty: Soak the beef in water for a short time before drying to remove some salt.
- Lack of Flavor: Increase the marinating time or add more spices to your marinade.
- Too Spicy: Balance the heat by adding a sweet element like honey to your marinade.
Here’s a simple guide to adjust flavors:
| Flavor Issue | Possible Reason | Quick Fix |
| Too Salty | Excessive curing time | Soak in water |
| Lack of Flavor | Weak marinade | Enhance marinade, marinate longer |
| Too Spicy | Too much spice | Add sweet elements to marinade |
Always taste your marinade before using it. Adjust your recipe based on your preference. Good luck and happy drying!
Frequently Asked Questions
How Is Dried Beef Made?
Dried beef is made by curing the meat with salt, seasoning it, then drying it under controlled conditions to remove moisture and preserve it.
How Do You Dry Beef Meat At Home?
To dry beef meat at home, first slice it thinly. Then, season as desired. Use a dehydrator or an oven at its lowest setting. Spread the slices evenly on trays. Dry until the meat is fully dehydrated, typically 6-8 hours.
Store in an airtight container.
What Cut Of Beef For Dried Beef?
Eye of round, top round, and bottom round cuts are ideal for making dried beef. These lean meats offer the best texture and flavor after drying.
Is Dried Beef The Same As Beef Jerky?
Dried beef and beef jerky are similar but not identical. Dried beef is salted and dried, often sliced thin, while beef jerky is marinated, seasoned, and dried to a chewier texture.
Conclusion
Making dried beef at home is simple and rewarding. You control the flavors and the process. Dried beef is perfect for snacks or adding to recipes. Keep the slices thin, the spices tailored, and the meat high-quality. Patience is key; good things take time.
Try this method and enjoy homemade dried beef. Your taste buds will thank you. Share your creations with friends and family. They’ll love the personal touch. Ready to get started? Your delicious dried beef awaits!