Every product is independently reviewed and selected by our editors. If you buy something through our links, we may earn an affiliate commission at no extra cost to you.
It’s impossible to think of a holiday gathering without turkey. But only the host knows the suffering of handling a turkey, especially the butchering process.
If you have done it right, in any way you want. But if not, then you’re surely in trouble. That’s why many people seek help from outside to handle it. But it costs a good amount of money, and most of the time, it’s done inhumanely.
So, what’s the point of making it hard for both your pocket and heart?
Just learn how to butcher a turkey, and solve your problem. It’s not rocket science and doesn’t take much time to learn.
So, get ready to celebrate this holiday with the combination of tradition and fun and be the perfect host of your party.
Required Product Recommendation
I have recommended and explained a few tools throughout the butchering process. Even though I have tried to describe all the steps as easily as possible, you may find it a bit hard.
That’s why to ease your burden; I will make some product recommendations so that the right product makes you confident enough to deal with all the hardships.
Knives: You can either use a chef’s knife or any utility knife for cutting and slicing. For the chef’s knife, you can consider Victorinox Fibrox Pro Knife. For the utility knife, you may consider the Box Cutter Utility Knife.
Heat Resistant Rubber Gloves: Rubber gloves are important for your hands while killing, cutting, and having a great grip while plucking. For rubber gloves, you may consider UXglove Chemical Resistant Latex Gloves.
Cutting Board: Cutting board is always preferable to make the cutting process easy and comfortable. And this is something you will surely find in your kitchen! And if not, then I would like to suggest an Extra Large Organic Bamboo Cutting Board.
Containers: The containers will help carry the turkey and its parts from here to there. You may consider having Rubbermaid Roughneck️ Storage Totes.
Scalding Tanks: It’s not mandatory, but it’ll make things easy. Bayou Classic Stainless Stockpot with Basket would be a great choice.
Mechanical Chicken Plucker: Indeed, it’ll require a handsome investment. But you’re planning to butcher turkeys regularly; then this thing will work as a savior. You may consider buying TX Poultry Plucker.
How To Butcher A Turkey – Step-By-Step Process (Explained)
A well-grown and healthy broad-breasted turkey could be 20-30 lbs. The size is enough to terrify people.
However, no matter what, a turkey should be butchered by keeping the trauma and stress as less as possible.
And it’ll happen when you do it by yourself and not giving the responsibility to any professional.
- Kill The Turkey
Make sure that before killing a turkey, you’ve stopped feeding it for a day. It keeps the crop empty and makes the cleaning process more manageable. However, it’s not a mandatory thing to do. Just a simple tip to avoid the extra mess.
Don’t forget to wear gloves and take a medium-sized knife. Ensure the knife is sharp enough to do the killing process as quickly as possible to reduce the turkey’s pain.
For the killing process, different people use different strategies. You can hang the turkey by its feet.
Then hold the throat and start cutting from the sides. Remember that it’s a bloody process, so you can consider wearing goggles. Another method for killing a turkey could be by placing its head through a plastic bag.
Cut a hole in the bag and then gently put the head through the hole and cover the whole body with the remaining plastic portion. It’ll help restrain the bird’s movement, and you can easily cut its throat to complete the killing process quicker.
However, many use the technique of breaking the neck. But it’s too painful and slow, and that’s why it’s never preferable.
Cutting the throat with a sharp knife makes the whole process more human than breaking the neck.
- Clean the carcass with water
When you’re positive about being done with the killing, now it’s time for some cleaning. As the killing has caused a bloody mess, you start with cleaning the carcass with water. It’ll help you to remove dirt or other objects from the body.
You can also forcefully press the turkey’s abdomen to take out any remaining stool outside the vent. Moreover, if you haven’t separated the head from the neck in the killing step, you can do that now.
Separating the head will be difficult with the knife you have used in the killing process. It’s better if you chose an ax to do that.
- Scald the turkey carefully
The scalding process is a bit tricky if you don’t have a mechanical chicken plucker. And if you don’t have it, then make sure from the next time you have.
So, this step’s remaining discussion is for those who will do the scalding without a mechanical chicken plucker.
Scalding is done to make the plucking process faster as it helps to take off the feathers from the turkey’s body very quickly.
Dunk the bird in a pot full of water that has a temperature between 145F-150F. Keep the bird inside the water for about 3-4 minutes.
You can also swirl the bird a few times to ensure the water’s heat has reached everywhere. Here you can use a scalding pot, too, although that’s optional.
Pull the feathers to be sure that the scalding is done correctly. However, don’t think that keeping the turkey in hot water for a longer time will speed-up the plucking process even more.
Instead, the heat will reach the skin and cause it to tear, which will turn the plucking process into a nightmare.
- Pluck the feathers
After you’re satisfied with the scalding, please take off the bird out of the water pot and get ready to pluck it. Place the turkey on a large table.
Try not to do the plucking without using any table. Or else, your back won’t forgive you.
There’s no quick or professional tip for plucking a turkey. You have to keep pulling off the feathers until it’s all clean.
We know it’s tiresome and annoying. But keep thinking about the delicious meal you’re going to have with this turkey. Hopefully, this motivation will mitigate the irritation.
However, wearing a pair of rubber gloves will help in this matter. With them, you will get a good grip, and the process will speed up a little bit. You know something is better than nothing.
- Start disemboweling now
The cutting should be done so that it is a few inches lower from the vent. You need to be cautious about not nicking the intestines.
While cutting, you may find some feces on the digestive tract. I know it’s gross, but you can’t help it.
So be careful and whenever it happens, clean the carcass immediately so that it doesn’t get the chance to contaminate the meat.
Now, gently pull the intestine and avoid rupturing them. Now put the hand inside the turkey’s body and take out the gizzard and liver. Both of them usually come out together.
You’ll find a small and green bike sack connected to the liver, and you need to remove that.
Also, in the gizzard, there’ll be a yellow lining which you should peel away. Rinse the whole gizzard properly.
Because after you cut it, you may find stones and half-digested food inside. So, yellow lining removal and cleaning with water are mandatory.
Now the next step is to take out the heart and then the lungs. Even though the heart is located deep inside the body, you won’t have much trouble finding it.
But the lungs will give you a hard time. Because the rib cage guards them, you need to move your finger tactically to pull them out.
Never forget to rinse all the organs you have taken out from inside the turkey. If you’ve followed all the steps mentioned above, you’re pretty much done with the organ removal process.
Now, it’s time to separate the windpipe and throat, which are also known as trachea and esophagus.
Cut the neck’s skin, and both the windpipe and throat will become easy to remove. Use your fingers and place them between the skin, and crop over the chest area.
Then, separate the crop. If you’ve listened to us and kept the turkey without any food for a day, you’re going to have a clean crop.
But if you haven’t. Then get ready to do some cleaning. Now it’s time to bathe the carcass again. Rinse every part thoroughly with cold water.
We are saying cold water because there’s a high chance that the turkey’s body is still heated, which can cause the germ to grow and contaminate the whole meat.
How To Separate Every Part Of The Turkey
If you’ve followed all the processes described above, then now it’s time to show off your cutting skills. So, without any further ado, let’s move the processes.
Prepare the workstation: Good preparation can make things way easier than you would ever think of. That’s why preparing the workstation is preferable. However, you don’t need to do a lot of fancy things.
Take a cutting board and a knife, and a damp towel. It could be a chef’s knife or a utility knife, whichever you prefer.
Also, put a damp towel under the cutting board. Because handling this massive bird isn’t an easy thing to do. So, a damp towel will keep the board to stay still while you’re battling to cut the turkey into pieces.
Remove giblets: If you have anyhow thought of skipping the disemboweling process, now it’s the time to do it. It won’t be a wise choice to move forward without completing this step.
Dry the turkey: While disemboweling, you are required to rinse the turkey with water multiple times. But it’s messy and difficult to handle a wet turkey. That’s why I use a towel to wipe the turkey and make it dry.
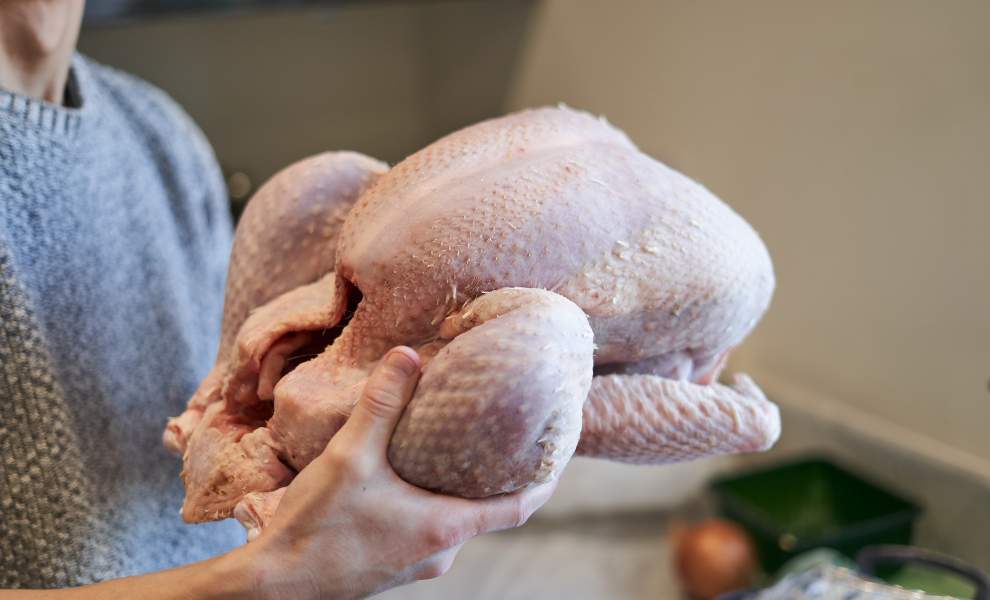
Start cutting: Put the bird on the cutting board on its back and pull off the body’s legs by using your hands. If you’re doing it with a partially frozen turkey, it will feel a bit difficult to do, so you need to pull harder.
While pulling the legs, you need a view of all the extra skin covering the whole thigh and breast area. You have to detach the skin from the breast as far away as you can make it.
Once the slicing is done, you’ll find the legs lying flat. However, it would be best if you pushed, even more, to make the lying as flat as possible.
Remove the wings: Use the knife to slice and expose the joints through the middle joint. Also, pull the wings so that you get a view of all the joints.
Now slice through it, which shouldn’t give you much trouble. If you are still having the trouble anyway, then it means you’re doing it wrong.
By wrong, I am meaning that you may be cutting it through the bones you shouldn’t do, and it’s bad for the knife as well.
To do it precisely, twist the knife or slide it left and right, and hopefully, you’ll find a smooth way of removing the wings.
However, many don’t remove the wings and keep them attached to the breast. If you don’t have any plans for the wings, such as using them for the stock, it’s completely fine to let them stay.
Flip the turkey: Till now, I have been doing all the work by keeping the turkey on its back. It’s time to flip it and rest it on its breast.
After flipping, carefully slice down the backbone, but the cutting should only be through the skin. Then cut the skin near the spine, wings, and legs.
Remove the legs: Separate the carcass legs by cutting it from the top of the thigh and near the oyster. Do the same thing with the other leg.
Remove the wishbone: Again, flip the bird and gently start to take the skin down to the frame of the crown. While cutting the skin near the breast, make sure not to cut the breast meat. It will expose the keel bone.
Now cut the keel bone from each of its sides, from the top of the bird and lower right of the wishbone. Use the knife gently and scratch out the wishbone. As it’s a turkey, removing it will take more effort than other small birds.
Remove the breasts: Cut off the breasts from the rib cage. However, while doing so, you may struggle to do the slicing through the wing joint.
In that case, cut the bones, but don’t force the knife over them. You need to be patient and gently twist and push the knife through the bones.
How To Clean Turkey With Fresh Water
Now put all the turkey’s separated parts into a big container to make room for this massive bird. And then, rinse every part thoroughly with cold water.
Remember that except for the scalding process, no matter which reason you use water, it has to be cold. Properly clean the turkey parts so that all the dirt, blood, or tiny lingering pieces gets removed.
How To Chill Turkey After Cleaning
Butchering a turkey is a tiring process, so you and your turkey both need to chill for some moment. Because you need rest for gaining the stamina for cooking delicious meat and the turkey that is ready to get butchered needs to cool-off as it helps to stop germs’ growth and keeps the meat and skin together.
You can chill the turkey either by duking it into a pot of icy cold water or put it into a fridge.
However, it’s unusual to find space on the refrigerator for this type of massive bird. Then again, our responsibility is to let you know all the alternatives and techniques and leave them for you to decide!
Leave the turkey on the cold water until its icy feeling has gone, which can take up to 6 hours.
How To Pack and Store A Turkey After Cutting
If you want to cook the turkey immediately, then go on and hit the stove. But if not, then pack the parts and store them properly.
Take the turkey out of the icy water or freezer and use a towel to dry it off. Then wrap them using shrink bags and tie up the front.
Make sure you don’t tie it too hard, or else when you dunk it on the warm water, the air won’t be able to escape.
Keep the turkey inside the warm water for 7-10 seconds, and then take it out. And here you go! All done and prepared to store your turkey in the freezer!
Mistakes To Avoid While Butchering Turkey
It’s natural to butcher a turkey for the first time and find it very overwhelming to handle this massive bird.
As a result, some common mistakes get repeated. So here is a heads up for letting you know about those mistakes.
- The sink bag or whichever bag you’re using, make sure they are heavy enough to handle the turkey’s weight. Or else, the pressure will make the turkey create a hole and fall through it.
- Wear old or dirty clothes while butchering the turkey. Because a lot of blood gets spilled, and you wouldn’t want to stain your fine clothes with that.
- Never let the turkey rest in the boiled water for more than 3-4 minutes. It will damage the skin and meat, making it hard to follow the rest of the steps.
What Is The Best Way To Clean A Turkey
Your turkey needs to be cleaned before, while, and after completing the butchering, especially before cooking.
Because raw meat is known for carrying germs and washing off the meat will reduce the percentage. If you clean the turkey thoroughly while doing the butchering, you’ll have a nice and clean outcome.
However, never use cold water for cleaning purposes. Rinse the turkey off with cold water and wash off all the dirt, blood, features, etc.
To do the cleaning, you can use a water hose, put it in a container filled with cold water or take one piece after another and clean them on the sink!
And don’t forget to wear a pair of rubber gloves which will not only give you a good grip for plucking the feathers but also offer good handling while rinsing the turkey pieces with water!
It also helps to avoid any cross-contamination as well.
When Should Turkeys Be Butchered
We understand that you’ve got all excited and can’t wait to have some turkey time. But before that, you need to know the time when a turkey is ready to get butchered.
They’re usually two types of turkeys, Broad Breasted turkeys problem and Heritage Breed turkeys. If you’re planning to feast on a broad breast turkey, then make sure its age is between 16-20 weeks.
And if you’ve decided on a heritage breed turkey, then the range between 24-28 will be perfect. This time restriction should be maintained because turkeys take a little longer to grow than any other poultry birds.
So, to have a fully grown and healthy turkey, it’s better to follow the schedule and have the perfect turkey!