Every product is independently reviewed and selected by our editors. If you buy something through our links, we may earn an affiliate commission.
An instant pot can take your cooking to another level if you give this magical cookware the proper care, from unboxing it to cooking using it. Nobody forgets to clean it after cooking but has anybody told you how to clean instant pot before first use?
No need to be confused. Your brand new instant pot requires a simple wash before first use just to make sure that there’s no unwanted manufacturing element hidden in your pot, and it’s really very easy to clean an instant pot even after cooking.
Cleaning ensures proper maintenance, which is very important to make your favorite cooking pot last for years to come.
Cleaning also offers an instant solution to pressure pin sticking, sealing ring stinking, and food sticking to the pressure ring area, and the surprising fact is that it’s easier to clean your instant pot than you think.
Things Needed To Clean Your Instant Pot
The inner pot, lid, rim, sealing ring, float valve, condensation collector, and steam rack all of its parts are dishwasher safe except the cooker base and the heating element.
And if there’s no dishwasher in your kitchen, a simple hand wash can perfectly do the job. Moreover, there are different types of cleaning to save your time and energy.
So, let’s try the easiest one.
How To Clean Instant Pot Before First Use
It’s always a good practice to clean any cookware before first use, even if it’s coming from the manufacturer.
To clean your instant pot before using it is as easy as drinking a cup of great coffee. First time cleaning will be even easier if you split the cleaning process into the following easy steps-
- Cleaning the inner pot & steam rack
- Cleaning the lid & other small parts
- Wiping down the exterior pot
What you’ll need to clean before first use
- Water
- Soap &
- A damp washcloth
It may seem to you that a big bowl will also be needed as the small parts are prone to fly away through the drain.
But you actually don’t need an extra bowl as you can use your inner pot as a bowl. Now let’s follow the steps one by one.
Cleaning The Inner Pot & Steam Rack
Hopefully, all parts are separated as you’re going to clean your instant pot before your first use. We’re going to clean the inner pot first as later it’ll be used as a bowl while cleaning other small parts.
You can clean the inner pot and steam rack just as you usually clean other stainless steel kitchen utensils.
These parts are made of stainless steel. So, nothing to worry about. Either throw them into your dishwasher or hold them under the kitchen faucet and switch it on (using soap or warm water is optional as it’s brand new).
The simple water force coming out from your faucet is enough to clean them for the first time. After 30 seconds of simple washing, let them rinse and then wipe with a damp cloth.
Cleaning The Lid & Other Small Parts
As usual for a new instant pot, the sealing ring, anti-block shield, float valve, and steam release valve are separated from the lid.
Take everything, including the condensation collector and place them carefully in the inner pot and fill up the inner pot with soapy water.
The lid is dishwasher safe. So, either you can wash it by hand or leave it on the top rack of your dishwasher. I prefer hand washing for the first time.
Use soapy water, then wash with clean water and finally wipe out with a damp cloth. Now carefully drain the soapy water from the inner pot, wash everything and let them dry. Also, don’t forget to wipe after washing.
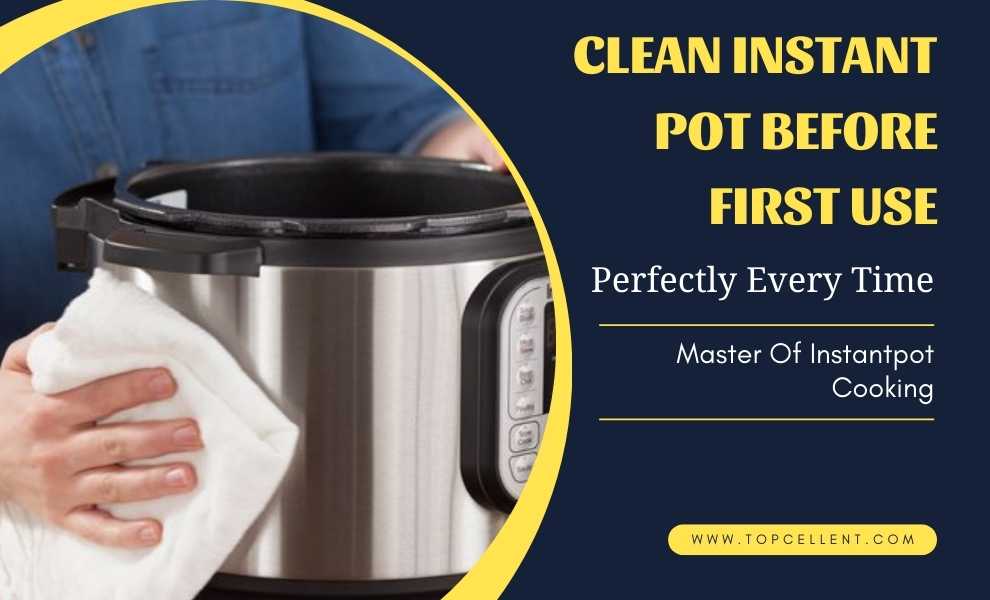
Wiping Down The Exterior Pot
You should never submerge your exterior pot in water, nor should you wash it; rather, you should wipe it with a damp washcloth or paper towel.
Wipe down both the inside and exterior. There’s the heating element inside the base of the exterior pot. So, you should not wash it.
How To Clean An Instant Pot After Use
First, make sure your instant pot is unplugged and has cooled down. Now separate all the parts carefully. It’ll seem easier as you’ve already assembled the pot, and the rest is just the same as the cleaning before first use.
The only difference is that this time you may need a small scrub brush to clean the area like under the sealing ring, anti-block shield, or rim (you can skip cleaning these places if no dirt is found there) where your hands can’t reach.
Also, be careful while cleaning the valves and the sealing ring. This regular maintenance will make your instant pot long-lasting.
However, after enjoying several dishes cooked in an instant pot, someday you may notice that your chicken curry is smelling like steamed fish, sometimes you may notice a bit of discoloration or even strong stains on the inner pot. That means your instant pot deserves a deep cleaning now, and here’s how to do it.
How To Deep Clean An Instant Pot
Depending on your usage, once a month or sooner, your instant pot will need a deep cleaning. This cleaning will make your instant cooker look like a new one.
You’ll need the following ingredients and equipment to give your magical cooker a thorough wash.
Ingredients & Equipment
- Vinegar
- Water
- Lemon
- Dish soap
- Damp cotton cloth
- Small scrub brush &
- Dishwasher (optional)
Now you can follow these simple instructions to deep clean your favorite instant pot.
Clean The Exterior Pot
You can start from the inner pot. But when it’s deep cleaning, I prefer starting from the exterior pot. It seems to be very easy to clean. Just take a damp cloth, wipe down the housing unit, and then the outside of the exterior pot.
Then use a small used toothbrush or scrub brush to remove any food residue from the rim. Actually, the regular cleaning and deep cleaning of the exterior pot are almost the same. That’s all about exterior pot cleaning, but don’t forget to unplug before starting your cleaning.
Look At The Lid
Separate every removable thing from the lid and give it a proper hand wash with soapy water first and then with clear water.
The Sealing Ring May Deserve Extra Care.
Hopefully, it’s already removed from the lid. So, inspect it with a vulture eye. It’s a crucial part of your instant pot. Minor cracking in this ring can greatly hamper your cooking. So, consider replacing it if there’s any damage, cracking, or deformities, and if it’s okay, then give it a proper wash.
Sometimes this ring becomes smelly because of the funky foods you cook in your instant pot. If you get any smell from it, you can consider giving it vinegar steam clean with lemon peels.
Fill your inner pot with one cup of vinegar, one cup of water, and three or four pieces of lemon peels. Then close the lid, set your instant pot to steam, run for two minutes, and let the pressure release naturally.
When it’s cooled down, remove the ring from the lid, let it air dry and then replace it again, making sure that it’s placed perfectly against the lid. This steaming will make the sealing ring odor-free.
Wash The Smaller Parts
Smaller parts are prone to get blocked with food residues. So, you should carefully inspect them and gently clean them one by one with the soapy water that you have near your hand. Submerging these small parts for a few minutes can ensure proper cleaning.
Wash The Inner Pot & Accessories
Finally, wash the spoon, inner pot, steam rack, and other instant pot accessories that you use in your instant pot cooking.
All these accessories are dishwasher safe. So, you can either throw them in the dishwasher or give them a minute hand wash.
Anyway, after washing the inner pot, you can use a paper towel and a few drops of vinegar to wipe the pot.
This extra care will ensure sanitization by removing detergent residues (if any) and bring a shiny look to your inner pot.
Reassemble
This is the final stage to get your instant pot prepared again to cook another delicious meal, and the best part of this stage is that you already know how to assemble it. Just make sure everything is dried out and nothing is forgotten.
Just like the sealing ring, sometimes the inner pot of your instant pot deserves a bit of extra care. The above cleaning can easily remove food residue from this pot and also can make it shiny but can’t clean burnt residue.
So, how about learning this cleaning hack which will help you clean your instant pot after food burns to the bottom.
How To Clean Burnt Instant Pot
This next-level cleaning can easily remove what soaking, scrubbing, and soaking some more can’t remove. It can remove scorched, burnt, or strong layers of brown cement from the bottom of the inner pot.
But, the surprising fact is that you’ll need only 4 cups of water, 3 tablespoons of baking soda, 1 tablespoon of liquid dish soap, and a soft brush to remove those brown cement from your inner pot.
Instructions
- Stir everything in the base of your inner pot
- Lock the lid and turn the float valve to a sealed position
- Cook at high pressure for five minutes
- Let the pressure release naturally
- Remove the pot and give it a quick scrub with a soft brush
- Finally, wash it with fresh water
You’ll be surprised when you’ll look at your inner pot after applying this cleaning hack. Proper care will make you a crazy instant pot chef. These are the most effective cleaning hacks to learn how to clean instant pot before first use or after every use.
How To Set Up An Instant Pot
If I’m not wrong, a steamer rack, rice paddle, soup scoop, rice measuring cup, condensation collector, quick reference guide, recipe book, and a user manual including the lid accessories are at your hand now.
Most electric pressure cookers come with these accessories. Make sure everything is thoroughly dried out.
The first thing you need to do to assemble your instant pot is to place the stainless steel inner pot into the exterior pot. Now, you’ve to assemble your lid. But, before assembling your lid, you should try to use it.
Look at your lid closely; you’ll find some markings like “Close – Inverted Triangle – Open.” No look at the rim of your exterior pot. There you’ll get markings stating “Locked Triangle – Unlocked Triangle”.
To close the lid, place it evenly on the rim and align the Inverted Triangle of the lid with the Unlocked Triangle of the rim, then twist clockwise to lock the lid.
Now try to open the lid. To open it, twist counterclockwise until the Inverted Triangle of the lid is aligned with the Unlocked Triangle of the rim.
Now you can assemble your lid. The sealing ring, steam release valve, float valve, and anti-block shield are the lid accessories.
You can start from the sealing ring. Carefully place it in the rack of the lid. You can easily notice whether it’s properly placed.
Never pull the ring by force if it’s not properly placed. Just gently remove it and try again. The size of this ring depends on the size of your instant pot. If the instant pot is 6 Quart, your sealing ring also will be 6 Qt.
Now grab the steam release valve and attach it to the exact place. You can easily identify the exact place because of its size and shape. Gently push it down to attach it properly. Then place the float valve.
This valve should easily pop up and down by flipping upside down the lid. Finally, place the anti-block shield, and you’re almost done.
There are only two more things to assemble. These are the steamer rack and condensation collector. A steamer rack is needed to cook steamed recipes. So, no need to use it now as you’re not going to cook any steamed food.
But, you have to place the condensation collector at the right slot. Turn around the exterior pot, and you’ll find the slot. It’s a bit easier to set than the sealing ring.
You’ll also find a lid fin, spoon shelf, and a power cord holder on the exterior pot. Now your instant pot is ready to plug in and get cooking.
But, before going to plugin, you should watch her determine how perfect is your first time assembling.
Hopefully, your first time assembling was perfect, and you’ve cooked your first-ever instant pot recipe. Cooking with instant pot is amazingly impressive.
So impressive that it’ll make you cook most of your meal using it. Anyway, after cooking your first instant pot meal, you noticed that your pot deserves a shower.
Yes, it’s true. It’s necessary to clean the instant pot after every use. Usually, the lid and its components become dirty after cooking and have a risk to be cracked.
The inner pot also may catch a lot of food residue, spill, and splatter, and very often, the sealing ring becomes smelling. So, you should clean your pot after every use, but this cleaning won’t take much time.