Every product is independently reviewed and selected by our editors. If you buy something through our links, we may earn an affiliate commission at no extra cost to you.
Tender, juicy smoked meat is one of life’s great pleasures. There’s nothing more delicious than a piece of evenly smoked meat on this earth. But going to a restaurant and ordering smoked meat every evening isn’t any wallet-friendly idea.
Again, electric smokers also tend to come with hefty price tags. So, I’ve decided to figure out how to make an electric smoker.
Going to buy a mini charcoal smoker can be a good idea for expert cooks. But, it’s almost impossible for an amateur chef like me to control the temperature (the key thing to ensure even smoking) in charcoal or pellet smokers. Therefore, it’s better to get my hands on making an electric smoker.
I wouldn’t have even considered doing this DIY project if it required any fireworks or welding. There are dozens of different ways to build a homemade electric smoker which require critical fireworks.
But, today, I’m going to show you something super easy as well as super effective to smoke almost anything.
Ready To Try This Diy? Here’s How To Make An Electric Smoker
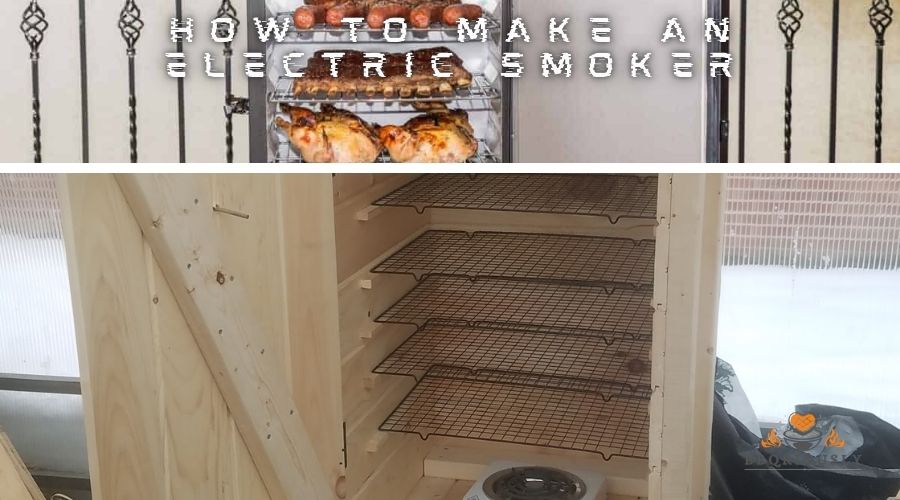
An electric smoker comes with two chambers, one chamber contains food in a hot, smoky environment, which is known as the food cabinet, and the other one generates smoke and heat.
For that reason, it may seem to be a bit difficult to connect those two chambers without any welding.
Note: This is an educational article only, and we do not assist in building this smoker. Do it at your own risk.
But, if you follow me till the end, you’ll come to know how to build an electric smoker without welding. Essentially you’ll be surprised to see the effectiveness of your handmade smoker. So, let’s see what you’ll need –
Items You’ll Need to Make Your Electric Smoker
- 2 tin-foils
- A pie tin
- BBQ gasket
- 6 wine corks
- 5 cinder blocks
- 2 clay flower planters
- A temperature gauge and
- One grilling grate to hold foods
- A 4” U bolt with nuts & washers
- One small grate to hold wood chips
- An electric heating element with plug and cord
Tools You’ll Need:
- Wrench for bolts
- Electric drill to drill the planters
- A pair of gloves to take care of your hands
Step by Step Guide To Build Your Diy Smoker
Ok, now that we’ve all the necessary stuff in our hands. So, let’s start building an amazing electric smoker with a flower planter-
Step-1: Airflow doesn’t cook your food. But, without proper airflow, you can’t smoke. So to ensure adequate airflow, drill four holes in each flower planter. Use a slender drill head to avoid breaking the clay planter and make the hole up to use.
There’s already a big hole (drainage hole) at the bottom of your planter, and right now, I’m gonna show you how to utilize those holes.

Step-2: Set up your heating element. You’ll need a small heating element to fit inside your flower planter, and don’t forget to pass the cord through the drainage hole of the first planter before setting up the plug with the cord. The big hole of your second planter will be used to place the temperature gauge.
Step-3: Choose a flat surface where you want to smoke. Put 2 cinder blocks on the surface in parallel. There should be a 4” gap between the two blocks.
Place the first planter on these blocks. Handle with care because now there’s your heating element in this planter.
Step-4: Hold the heating element vertically inside the planter and place the rest of 2 cinder blocks at the bottom of this planter. Make sure the blocks are firmly placed, and then lay your electric burner on those blocks.
Step-: Put the last cinder block on the heating coal, then place the small grate on this block. Now cover this grate with tin foil and arrange your wood chips here on it.
Then, take your grilling grate and let it sit on the lip of the flower pot. Your grilling grate should be round and big enough to sit on the planter lip perfectly.

Step-6: Cut and fit your BBQ gasket to the rims of both the first and second flower planter.
Step-7: Invert your second planter over the first one, and your smoker is almost ready now.
Then, measure your U bolt and drill two more holes besides the big hole of your second clay planter, and make a handle.
Your planters will be too hot to touch while cooking. So, this handle on the second planter is important.
Step-8: Remove the second planter gripping the handle you just made. Wipe the grilling grate with a clean cloth or paper towel and arrange your desired food on this grate.
Fill up your pie tin and put it beside the food. This water will prevent the food from getting dry.
Step-9: Plug in your DIY electric smoker, wait for the smoke to come out, and then cover your grilling grate with the second planter.
Step-10: Take the second tinfoil, fold it and nicely cover the drainage hole. Next to that, insert the probe of your temperature gauge into your smoker through this folded tinfoil. You can now read the temperature.
Final Step: If you need to increase the temperature, block the holes using wine corks. Shave these corks if needed to fit the hole. Block only 2 holes at a time. If you need more heat, then block more holes.
If you need even more temperature, then either you have to buy a more powerful heating element, or you have to get your burner a bit closer to your grilling grate using two more cinder blocks.
Things To Consider When Building An Electric Smoker
Making an electric smoker is not as difficult as it seems to be. There’s no firework, and even no welding is needed if you build it with flower planters.
Using ceramic flower planters will give an even better look to your DIY electric smoker. A smoker is actually a basic cooking appliance that cooks in a smoky environment.
So, considering the following things will help you build a workable electric smoker.
- Temperature Control
Temperature control is the most important part of smoking food. An electric smoker is designed with a high-tech control panel that allows users to control the cooking temperature by pushing a few buttons. But, the temperature control system in your handmade electric smoker is 100% manual.
You can install an analog or even a digital heat control box, but that’ll cost you a big amount. Moreover, it’ll require advanced wiring skills.
So, I don’t prefer adding those features to a DIY smoker. Instead, you can easily control the temperature by blocking the holes, which limits airflow and thus increases the temperature in your cooking chamber. You can also place more workable things on the heating plate to hold the small grate.
- Air Flow
Airflow also plays a vital role in smoking food. If there’s no airflow in your cooking space, an excess of smoke will be stacked there, which makes the food taste bitter.
Airflow helps to keep the heat and smoke traveling inside the smoker and kicks the old smoke out of it so that the food gets an aromatic smoky flavor.
Smoke is prone to go upwards, and in our smoker design, we’ve put the smoking element (wood chips) just beneath the cooking grate. So, there will be no problem for the smoke to travel through the whole food chamber.
- Venting System
You’ve already known about the importance of airflow. To ensure proper airflow, professionally built smokers are designed with venting fans.
Venting also helps to control the temperature. Our handmade smoker is also designed with venting.
If you didn’t miss my instruction, you’ve drilled 4 holes in each planter. These holes will work as a venting process.
So, never block all the holes, and that’s why though you’ve drilled 8 holes, there are only 6 corks on the list. And be careful while drilling the holes. Holes should be as near as possible to the bottom of your planters.
- Materials
These are the items you need to build your DIY smoker. You should be very, very careful while buying these materials.
First of all, you should buy the heating element and its necessary components (cords and plug). Your heating device should generate enough heat. You can go for 1200 watts of the electric burner.
Next to that, you can buy the grates. Then measure the dimension of your grates and electric hot plate and make sure these will properly sit into the flower planter. Some flower planters don’t have a lip.
Avoid these planters because you’ll need planter lips to set your cooking grate. The rest of the items are not so critical. Just try to choose the right quality of materials.
- Seasoning
It’s another important thing to consider. After making my first DIY smoker, I forgot to season. As a result, I couldn’t eat the first batch of food.
The food was smelling like burnt clay. So, don’t make this same mistake. Seasoning an electric smoker is very easy.
My grandma used to say that seasoning is fake cooking. That means, instead of smoking some sausage, meat, or any other foods of your choice, just place a cinder block on your cooking grate and smoke for 4 to 5 hours at the highest heat.
You can also wipe inside the second planter with liquid cheese or any cooking oil. Seasoning also will help you know if everything is fine.
How Much Does It Cost To Build An Electric Smoker
It depends on the quality of the smoker you’ll build. Anyway, let’s calculate the minimum cost of making a DIY electric smoker with a clay flower planter from scratch.
| Materials | Price (per unit/pack) |
|---|---|
| 2 clay flower planters | $5 – $10 |
| BBQ gasket | $5 – $10 |
| A 4” U bolt with nuts & washers | $8 – $10 |
| 6 wine corks | $8 – $10 |
| 5 cinder blocks | $5 – $6 |
| One small grate to hold wood chips | $10 – $15 |
| One grilling grate to hold foods | $15 – $25 |
| 2 tinfoils | $5 – $10 |
| A pie tin | $5 – $10 |
| A temperature gauge and | $10 – $15 |
| An electric hot plate with plug and cord | $25 – $35 |
| Electric drill to drill the planters | $40 – $60 |
| Wrench for bolts & | $10 – $15 |
| A Pair of gloves to take care of your hands | $10 – $15 |
| Approximate minimum total cost = | Around $200 |
You can even buy a new electric smoker at this price. But, if you luckily found an electric drill set, u bolt, and other extra essentials in your storeroom, then the total cost of building your smoker will come down to $50. In that case, you just have to buy planters, grates, and heating coals.
No matter if it costs $50 or $200, nothing can stop a DIY enthusiast from making something new. After successfully making your first smoker, you can also try making more advanced smokers with a larger cooking space.
Why I Didn’t Talk About Other Homemade Smokers
Ugly Drum Smoker is one of the most popular handmade electric smokers. But, it requires advanced wiring skills.
Moreover, it’s not possible for everyone to drill a drum perfectly, and a pre-owned drum usually costs more than $50, where the total cost may exceed $300.
Yap, it gives off a better as well as a bigger smoker. So, maybe you can try it next time.
Another favorite DIY electric smoker is made of a trash can. The cost of making a trash can smoker is just the same as the flower planter smoker. But, flower planters retain heat more effectively than thin trash cans. So, I didn’t talk about this option.
Some DIY enthusiasts also build their electric smokers with brick and cement. They know how to use concrete, and this smoker is not portable and very big in size.
They usually build it in their backyard. If you have a wide backyard and don’t have any plans to move, then you can also try this giant handmade electric smoker.
These are the most common handmade electric smokers. But, you can build your own smoking appliance with almost anything from an old gas tank to your unused file cabinet.
But the easiest of all is to build with flowerpots. It requires no advanced skills, and anyone can build effectively. Anyway, the main reason that makes me a big fan of flower planter electric smokers is the money.
Final Thoughts
Billionaires may think of making their DIY electric smokers from gold drums. But I’m happy with my clay pot smoker. There’s no firework, no welding, and essentially no risk. It’s easy to build.
It takes only a couple of hours to get the job done. From meat to fruits, I can smoke whatever I want. This is the cheapest and easiest way to make an electric smoker. Try it today and enjoy it for months after months.