Every product is independently reviewed and selected by our editors. If you buy something through our links, we may earn an affiliate commission at no extra cost to you.
In the realm of modern grilling technology, the Pit Boss grill stands as a symbol of convenience and innovation. However, encountering connectivity issues with Wi-Fi or Bluetooth can be a snag in an otherwise seamless experience.
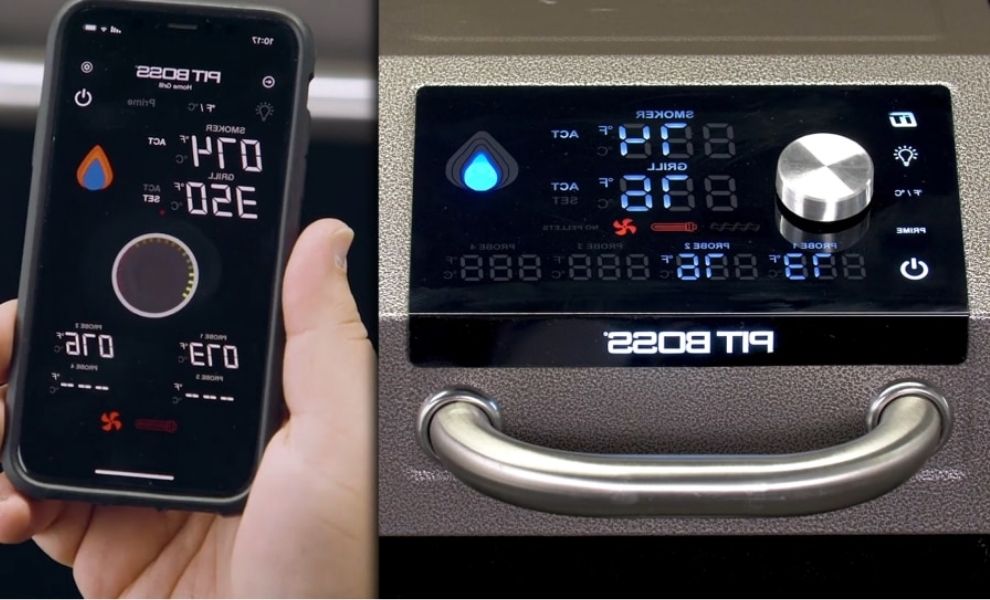
Fear not, for here’s a comprehensive troubleshooting guide to get your Pit Boss grill back online and connected to your network.
Pit Boss Won’t Connect to WiFi: The Reasons & Troubleshooting Guide
In this section, we’ll walk you through some common troubleshooting steps to help you get back online and grilling in no time.
Check Signal Strength
If your Pit Boss won’t connect to the Wi-Fi, the first thing you should check is the signal strength.
A weak signal can cause connection issues, so make sure your grill is within range of your router. If it’s too far away, try moving it closer to see if that improves the signal.
Additionally, walls and other obstacles can interfere with the signal, so keep that in mind when placing your grill.
Reset The Wi-fi Network
If checking the signal strength doesn’t solve the problem, the next step is to reset the Wi-Fi network.
This can help resolve any temporary network issues that may be preventing your Pit Boss from connecting.
To do this, follow these steps:
- Turn off your grill and unplug it from the power source.
- Unplug your router and modem from the power source.
- Wait for 30 seconds, then plug in your modem and router.
- Wait for them to fully boot up and establish a connection.
- Plug your grill back in and turn it on.
Once the network is reset, try connecting your Pit Boss to the Wi-Fi again and see if it works.
Update Firmware
If the previous steps didn’t fix the issue, it’s possible that outdated firmware could be to blame. Pit Boss regularly releases firmware updates to improve performance and fix bugs, so ensuring your grill has the latest software is essential.
Here’s how you can update the firmware:
- Visit the Pit Boss website and navigate to the support or downloads section.
- Enter your grill’s model number to find the appropriate firmware update.
- Download the update file onto a USB drive.
- Plug the USB drive into your grill’s USB port.
- Follow the instructions on your grill’s display to initiate the update.
Updating the firmware can often resolve connectivity issues and improve the overall performance of your Pit Boss grill.
By following these troubleshooting steps, you should be able to get your Pit Boss connected to the Wi-Fi again.
Checking The Network Settings
If you’re experiencing trouble connecting your Pit Boss grill to your WiFi network, it’s crucial to check the network settings to identify the source of the issue.
By examining a few key factors, you can pinpoint the problem and troubleshoot it effectively. In this section, we will go through some essential network settings to verify on your Pit Boss grill.
Verify SSID And Password
The first thing you should check is the SSID (Service Set Identifier) and password for your WiFi network.
The SSID is the name of your WiFi network, while the password is the authentication key that allows access to the network.
Incorrectly entering either of these details can prevent your Pit Boss grill from connecting successfully.
To ensure the SSID and password are correct, follow these steps:
- Access the control panel or mobile app of your WiFi router.
- Locate the network settings section, usually labeled ‘Wireless’ or ‘WiFi.’
- Check the SSID name displayed, and note it down.
- Verify the password associated with the SSID and make sure it’s accurate.
Ensure DHCP Is Enabled
The Dynamic Host Configuration Protocol (DHCP) is responsible for assigning IP addresses to devices on your network.
If DHCP is not enabled, your Pit Boss grill may fail to obtain an IP address and thus struggle to connect to WiFi. Here’s how you can verify DHCP settings:
- Access the control panel or mobile app of your WiFi router.
- Look for the DHCP settings section, usually located under ‘LAN’ or ‘Network.’
- Confirm that DHCP is enabled; if it’s disabled, enable it.
Check For IP Address Conflict
In some cases, an IP address conflict can hinder the connection between your Pit Boss grill and your WiFi network. This conflict occurs when two devices on the same network are assigned the same IP address.
To check for IP address conflict:
- Access the control panel or mobile app of your WiFi router.
- Navigate to the ‘Connected Devices’ or ‘DHCP Client List’ section.
- Scan the list of connected devices and ensure that none share the same IP address.
- If you find an IP address conflict, change the IP address of one of the devices involved.
Confirm Mac Address Filtering
MAC address filtering allows you to control which devices can connect to your WiFi network. If your Pit Boss grill’s MAC address is not added to the allowed list, it will be rejected and unable to connect.
To verify MAC address filtering:
- Access the control panel or mobile app of your WiFi router.
- Find the MAC address filtering settings, typically under ‘Wireless’ or ‘Security.’
- Check if MAC address filtering is enabled.
- If enabled, ensure that the MAC address of your Pit Boss grill is added to the allowed list.
By examining and ensuring the accuracy of these network settings, you can eliminate potential obstacles that may be preventing your Pit Boss grill from connecting to WiFi.
Remember to double-check each step and make any necessary adjustments to resolve the connectivity issue.
Performing A Factory Reset
If your Pit Boss won’t connect to Wi-Fi, performing a factory reset can often help resolve the issue. Understanding the factory reset process is essential to ensure you follow the correct steps and get your Pit Boss up and running again.
Now, we will guide you through the factory reset process for your Pit Boss grill.
Understanding The Factory Reset Process
Before diving into performing a factory reset, it’s important to understand what it entails.
A factory reset essentially restores your Pit Boss grill to its original settings, erasing all the customized configurations and data that may be causing connectivity issues.
It is similar to starting with a clean slate, and it can potentially fix software glitches or conflicts that may be preventing your Pit Boss from connecting to your Wi-Fi network.
Performing a factory reset on your Pit Boss grill is a straightforward process.
Follow these steps to reset your grill and possibly resolve the Wi-Fi connectivity problem:
- Ensure that your Pit Boss grill is powered off.
- Locate the reset button on your grill’s control panel. It is usually a small, recessed button labeled “Reset.”
- Using a small tool like a paperclip or a toothpick, press and hold the reset button for about 10 seconds.
- Release the reset button once the LED lights on the control panel start to flash or the grill powers on.
- Wait for a few minutes to allow the grill to complete the factory reset process.
- Power on your Pit Boss grill and proceed to set it up as you would with a new device.
- Once the setup is complete, attempt to connect your Pit Boss to your Wi-Fi network again.
Performing a factory reset can help eliminate any software-related issues that were causing your Pit Boss to have trouble connecting to Wi-Fi.
After completing the reset process, you should be able to re-establish the connection and maximize the capabilities of your Pit Boss grill.
Alternative Connection Methods
Looking for alternative methods to connect your Pit Boss grill to Wi-Fi? If your Pit Boss won’t connect to Wi-Fi, there are a couple of alternative connection methods you can try out.
Let’s explore two options: using an Ethernet connection and setting up a Wi-Fi extender.
Using Ethernet Connection
If your Pit Boss grill is not connecting to Wi-Fi, one alternative method you can try is using an Ethernet connection. This method involves connecting your grill directly to your router using an Ethernet cable.
Here’s a step-by-step guide on how to do it:
- First, make sure you have an available Ethernet port on your router.
- Next, locate the Ethernet port on your Pit Boss grill. It’s usually located on the back or side of the control panel.
- Plug one end of the Ethernet cable into the Ethernet port on your grill and the other end into the available Ethernet port on your router.
- Once connected, power on your grill and navigate to the Wi-Fi settings menu.
- From there, follow the on-screen instructions to set up a wired connection. This may involve entering your Wi-Fi network password.
- After completing the setup process, your Pit Boss grill should be connected to the internet via the Ethernet connection.
Setting Up A Wi-fi Extender
If using an Ethernet connection is not feasible for you, setting up a Wi-Fi extender can be another alternative option. A Wi-Fi extender boosts your existing Wi-Fi signal strength, allowing your Pit Boss grill to connect more easily.
Here’s how you can set up a Wi-Fi extender:
- Start by purchasing a Wi-Fi extender that is compatible with your router.
- Plug the Wi-Fi extender into a power outlet within range of your router.
- Follow the manufacturer’s instructions to connect the extender to your existing Wi-Fi network. This usually involves pressing a WPS button or using a mobile app.
- Once the extender is connected to your Wi-Fi network, find a suitable location to place it. Ideally, it should be within range of both your grill and your router.
- Power on your Pit Boss grill and access the Wi-Fi settings menu.
- Select the Wi-Fi extender network from the available networks list.
- Enter the required Wi-Fi network password, if prompted.
- After successfully connecting to the Wi-Fi extender, your Pit Boss grill should now be able to access the internet.
These alternative connection methods can be useful if your Pit Boss grill is facing connectivity issues with your Wi-Fi network. Give them a try and enjoy the benefits of a connected grill!
Preventing Future Connectivity Issues
Dealing with a Pit Boss grill that won’t connect to Wi-Fi can be frustrating. However, there are steps you can take to prevent future connectivity issues and ensure a seamless grilling experience.
Let’s discuss some important factors to consider when it comes to Wi-Fi range, maintaining a stable network, and regular maintenance.
Wi-fi Range Considerations
When setting up your Pit Boss grill, it’s crucial to take into account the range of your Wi-Fi network. The signal strength of your network plays a significant role in maintaining a stable connection between your grill and the app.
Here are a few things to keep in mind:
- Ensure that your grill is placed within range of your Wi-Fi router. The closer the grill is to the router, the stronger the signal will be.
- Avoid placing your grill near potential obstacles that may interfere with the Wi-Fi signal, such as walls, large appliances, or metal objects.
- If you’re grilling in an outdoor area, consider using Wi-Fi extenders or mesh systems to boost the signal and extend the range.
Ensuring A Stable Wi-fi Network
In order to prevent connectivity issues with your Pit Boss grill, it’s essential to have a stable Wi-Fi network.
Here are a few tips to achieve this:
- Make sure you have a reliable and high-speed internet connection. Slow or unreliable internet can cause interruptions in the connection.
- Secure your Wi-Fi network with a strong password to prevent unauthorized access and potential interference.
- Consider assigning a static IP address to your Pit Boss grill to avoid potential conflicts in IP allocation.
- Regularly update your router’s firmware to ensure that you have the latest security patches and performance improvements.
Regular Maintenance
Performing regular maintenance on your Pit Boss grill and its accompanying Wi-Fi connectivity can help prevent future issues.
Here are some recommended maintenance practices:
- Keep your grill clean and free from debris. Regularly remove ash and grease buildup to ensure optimal performance.
- Check for software updates for both your grill and the connected app. Updating to the latest versions can address any bugs or compatibility issues.
- Restart your grill and Wi-Fi router periodically. This can help refresh the connection and resolve any temporary glitches.
By considering Wi-Fi range, ensuring a stable network, and practicing regular maintenance, you’ll be taking proactive steps to prevent future connectivity issues with your Pit Boss grill.
Following these guidelines will help ensure that you can enjoy the convenience and control of grilling with Wi-Fi without any interruptions.
Conclusion
The Pit Boss grill’s inability to connect to Wi-Fi or Bluetooth can be a minor setback, but with the right troubleshooting steps, you can swiftly regain its connectivity and resume enjoying its convenience and features.
Remember, each grill model might have specific nuances in connectivity. Hence, patience and a methodical approach are crucial. By following these steps, you’ll likely troubleshoot and resolve the connectivity issue, getting your Pit Boss grill back online and ready for flavorful grilling sessions.